architectural hardware

Your name Cabinet Pulls

Using a family font as a custom cabinet pull.

We are often asked to make custom door handles and custom cabinet pulls but not all requests can be met so I wanted to share with you a recent project we have just completed.

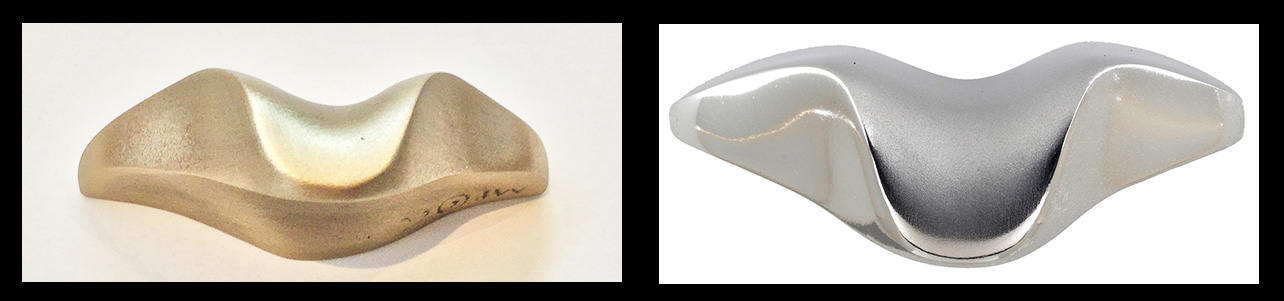
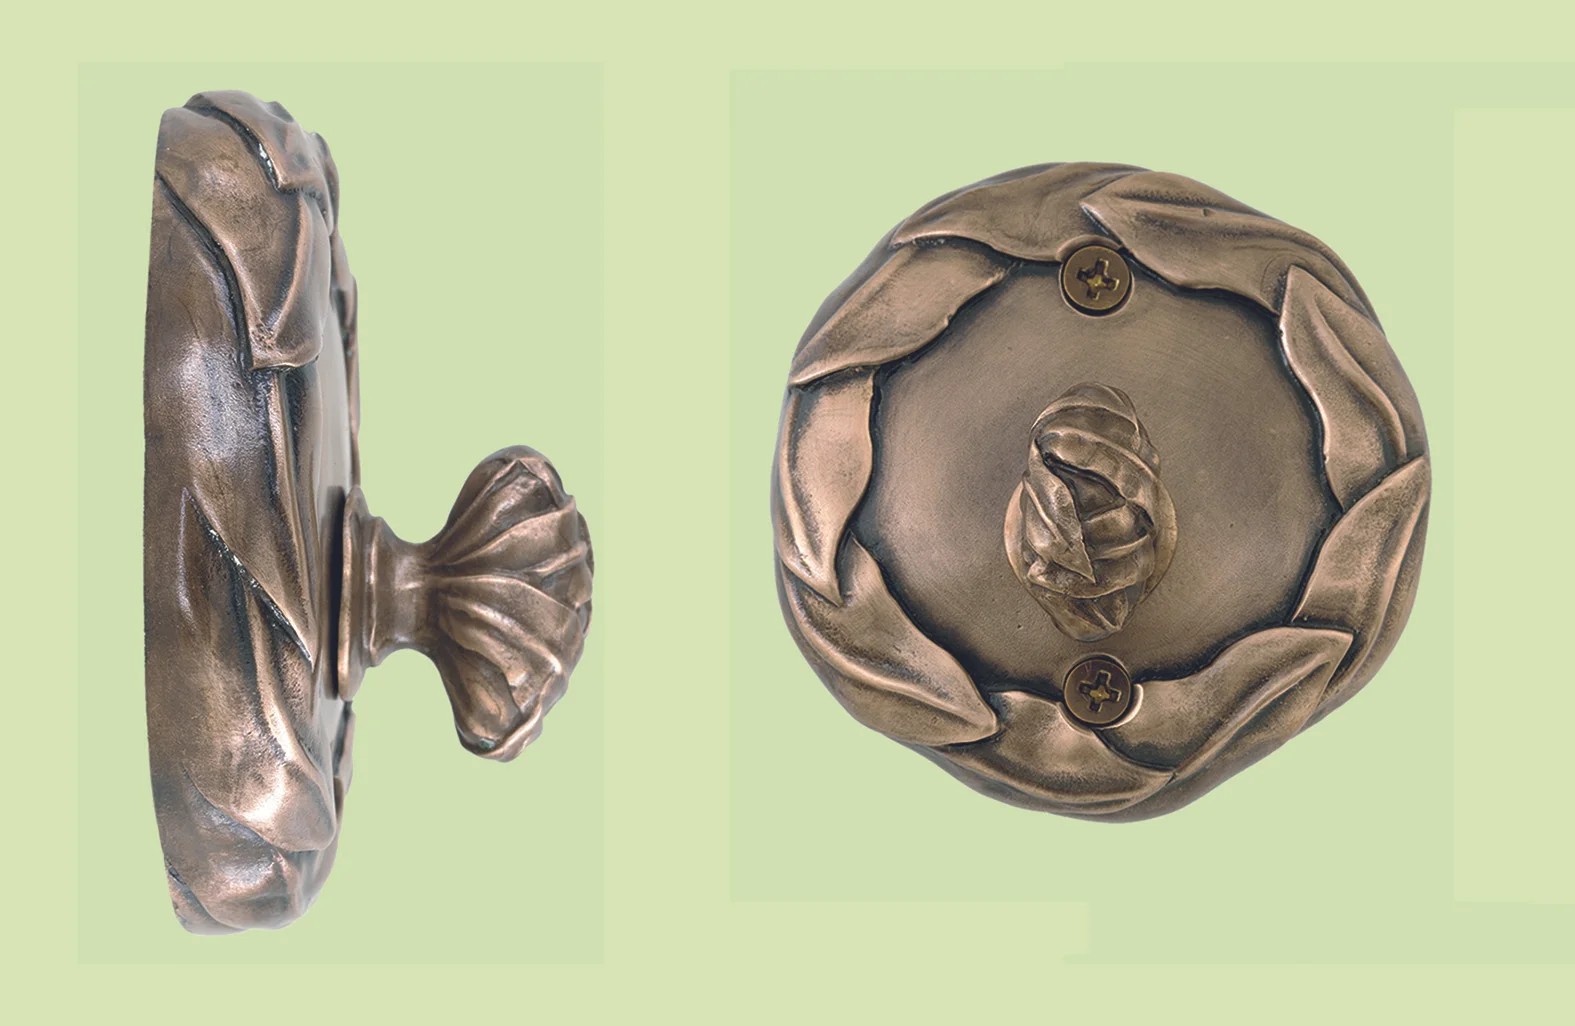
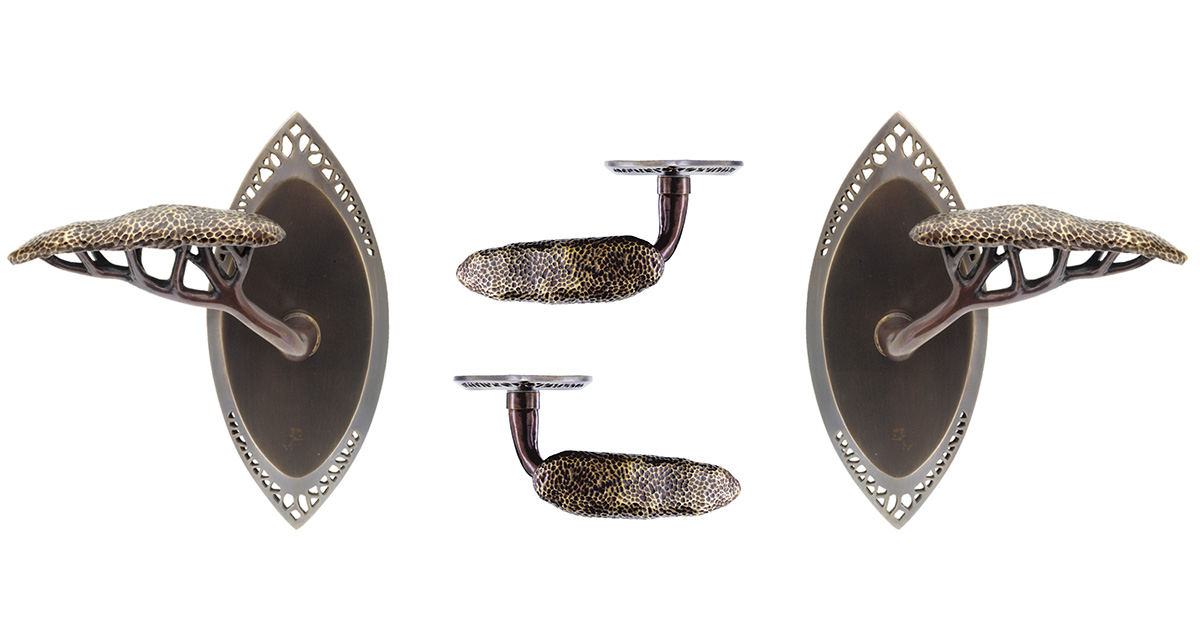
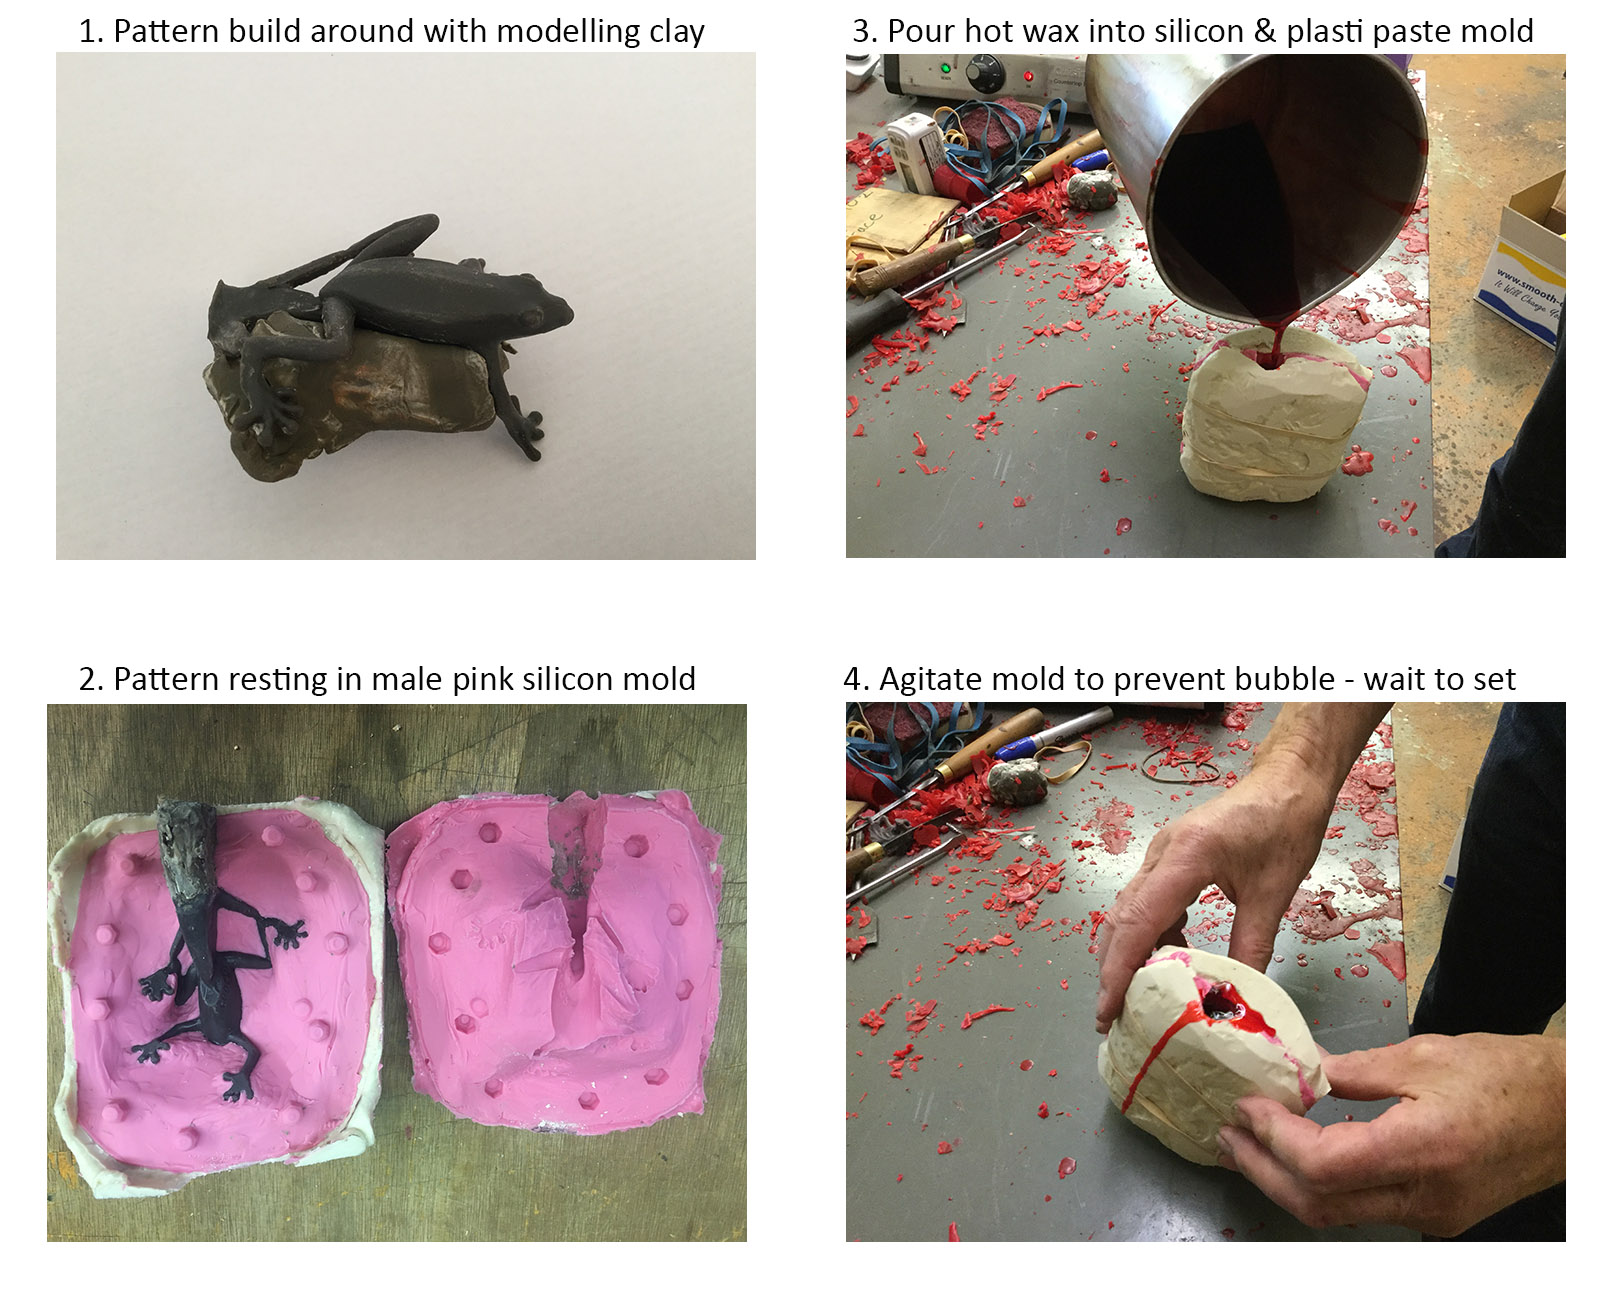
The home owner was remodeling his kitchen and wanted to use his simple but specific family business brand to create cabinet pulls. The client had 2 good digital files showing the front and side of his JJ font and as I shared in an earlier post we were able to use this to create a 3D model. Once the model was complete a mold for the single and double JJ 2 was created, wax replicas were made and shelled and finally steel castings were poured.

Brand Name Custom Cabinet Pull

Brand Name Custom Cabinet Pull

The project was one we were happy to make for following reasons.

While the clients budget was fairly modest the design was not overly complicated and the 3D modeling could be done easily as there were excellent pdf files that showed the front and profiles of the J font and they were scaled to size. The quality of the files helped keep the modelling costs down and helped speed the production process.

your-name-cabinet-pull.jpg


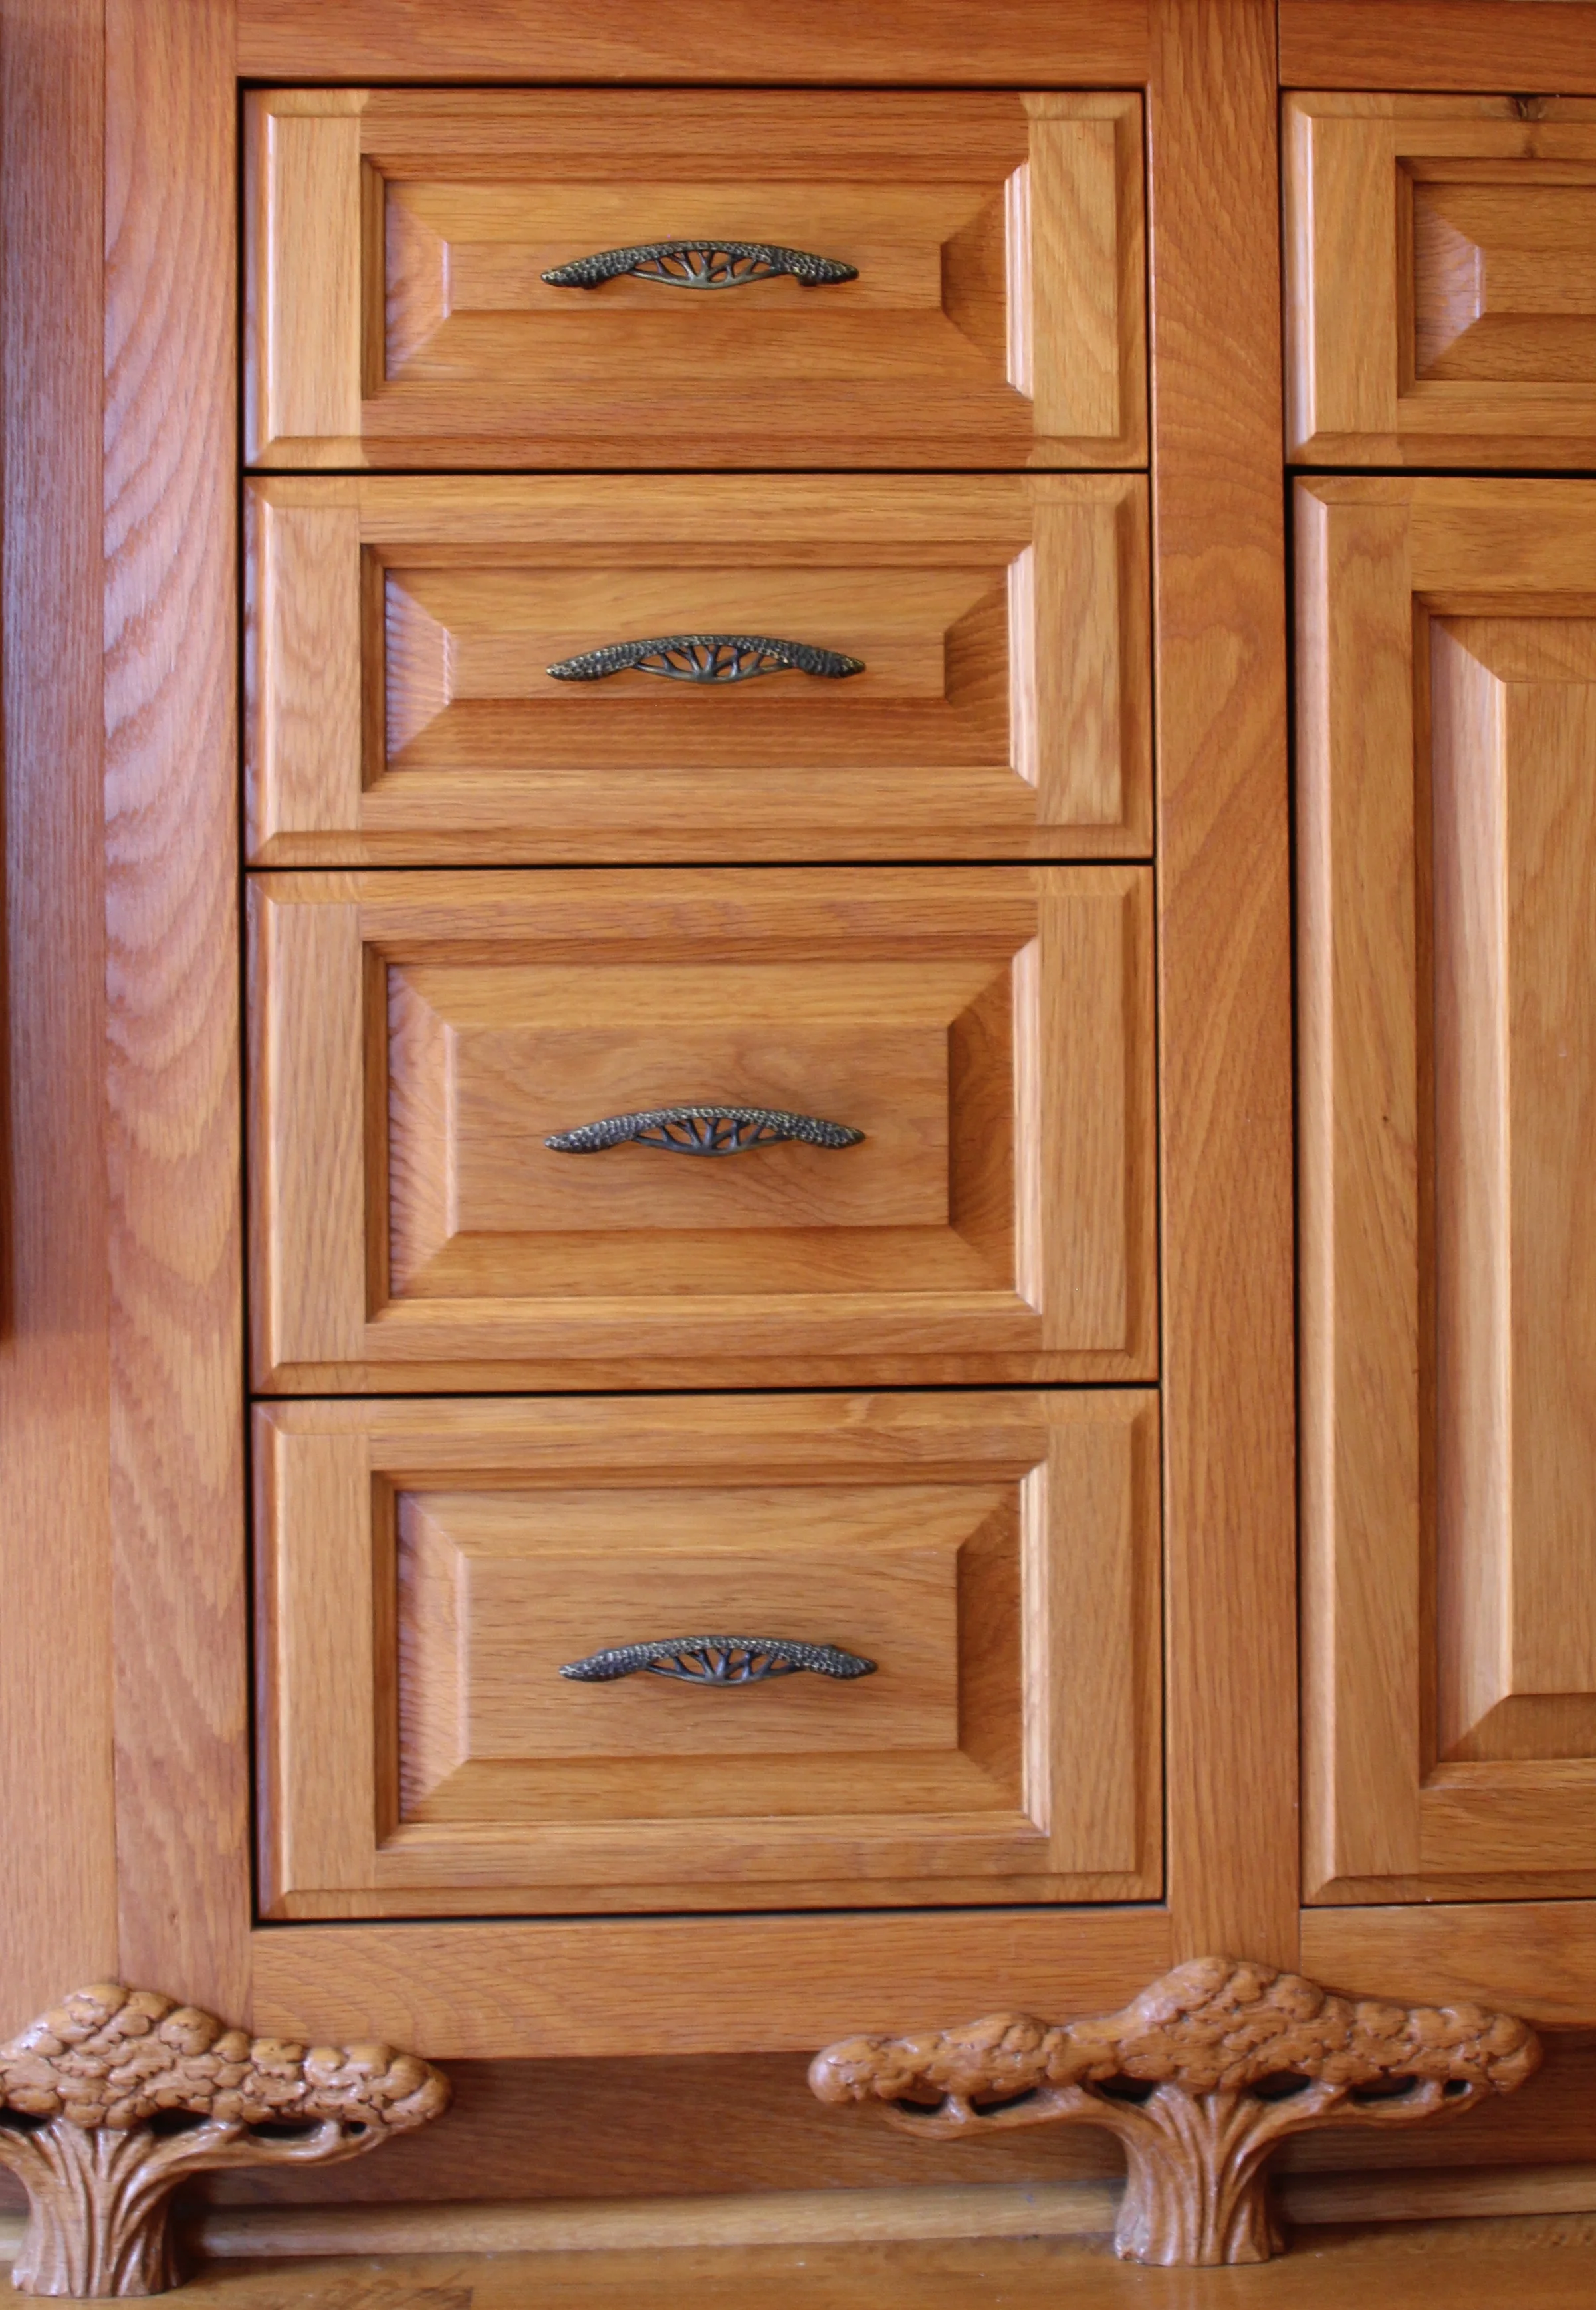
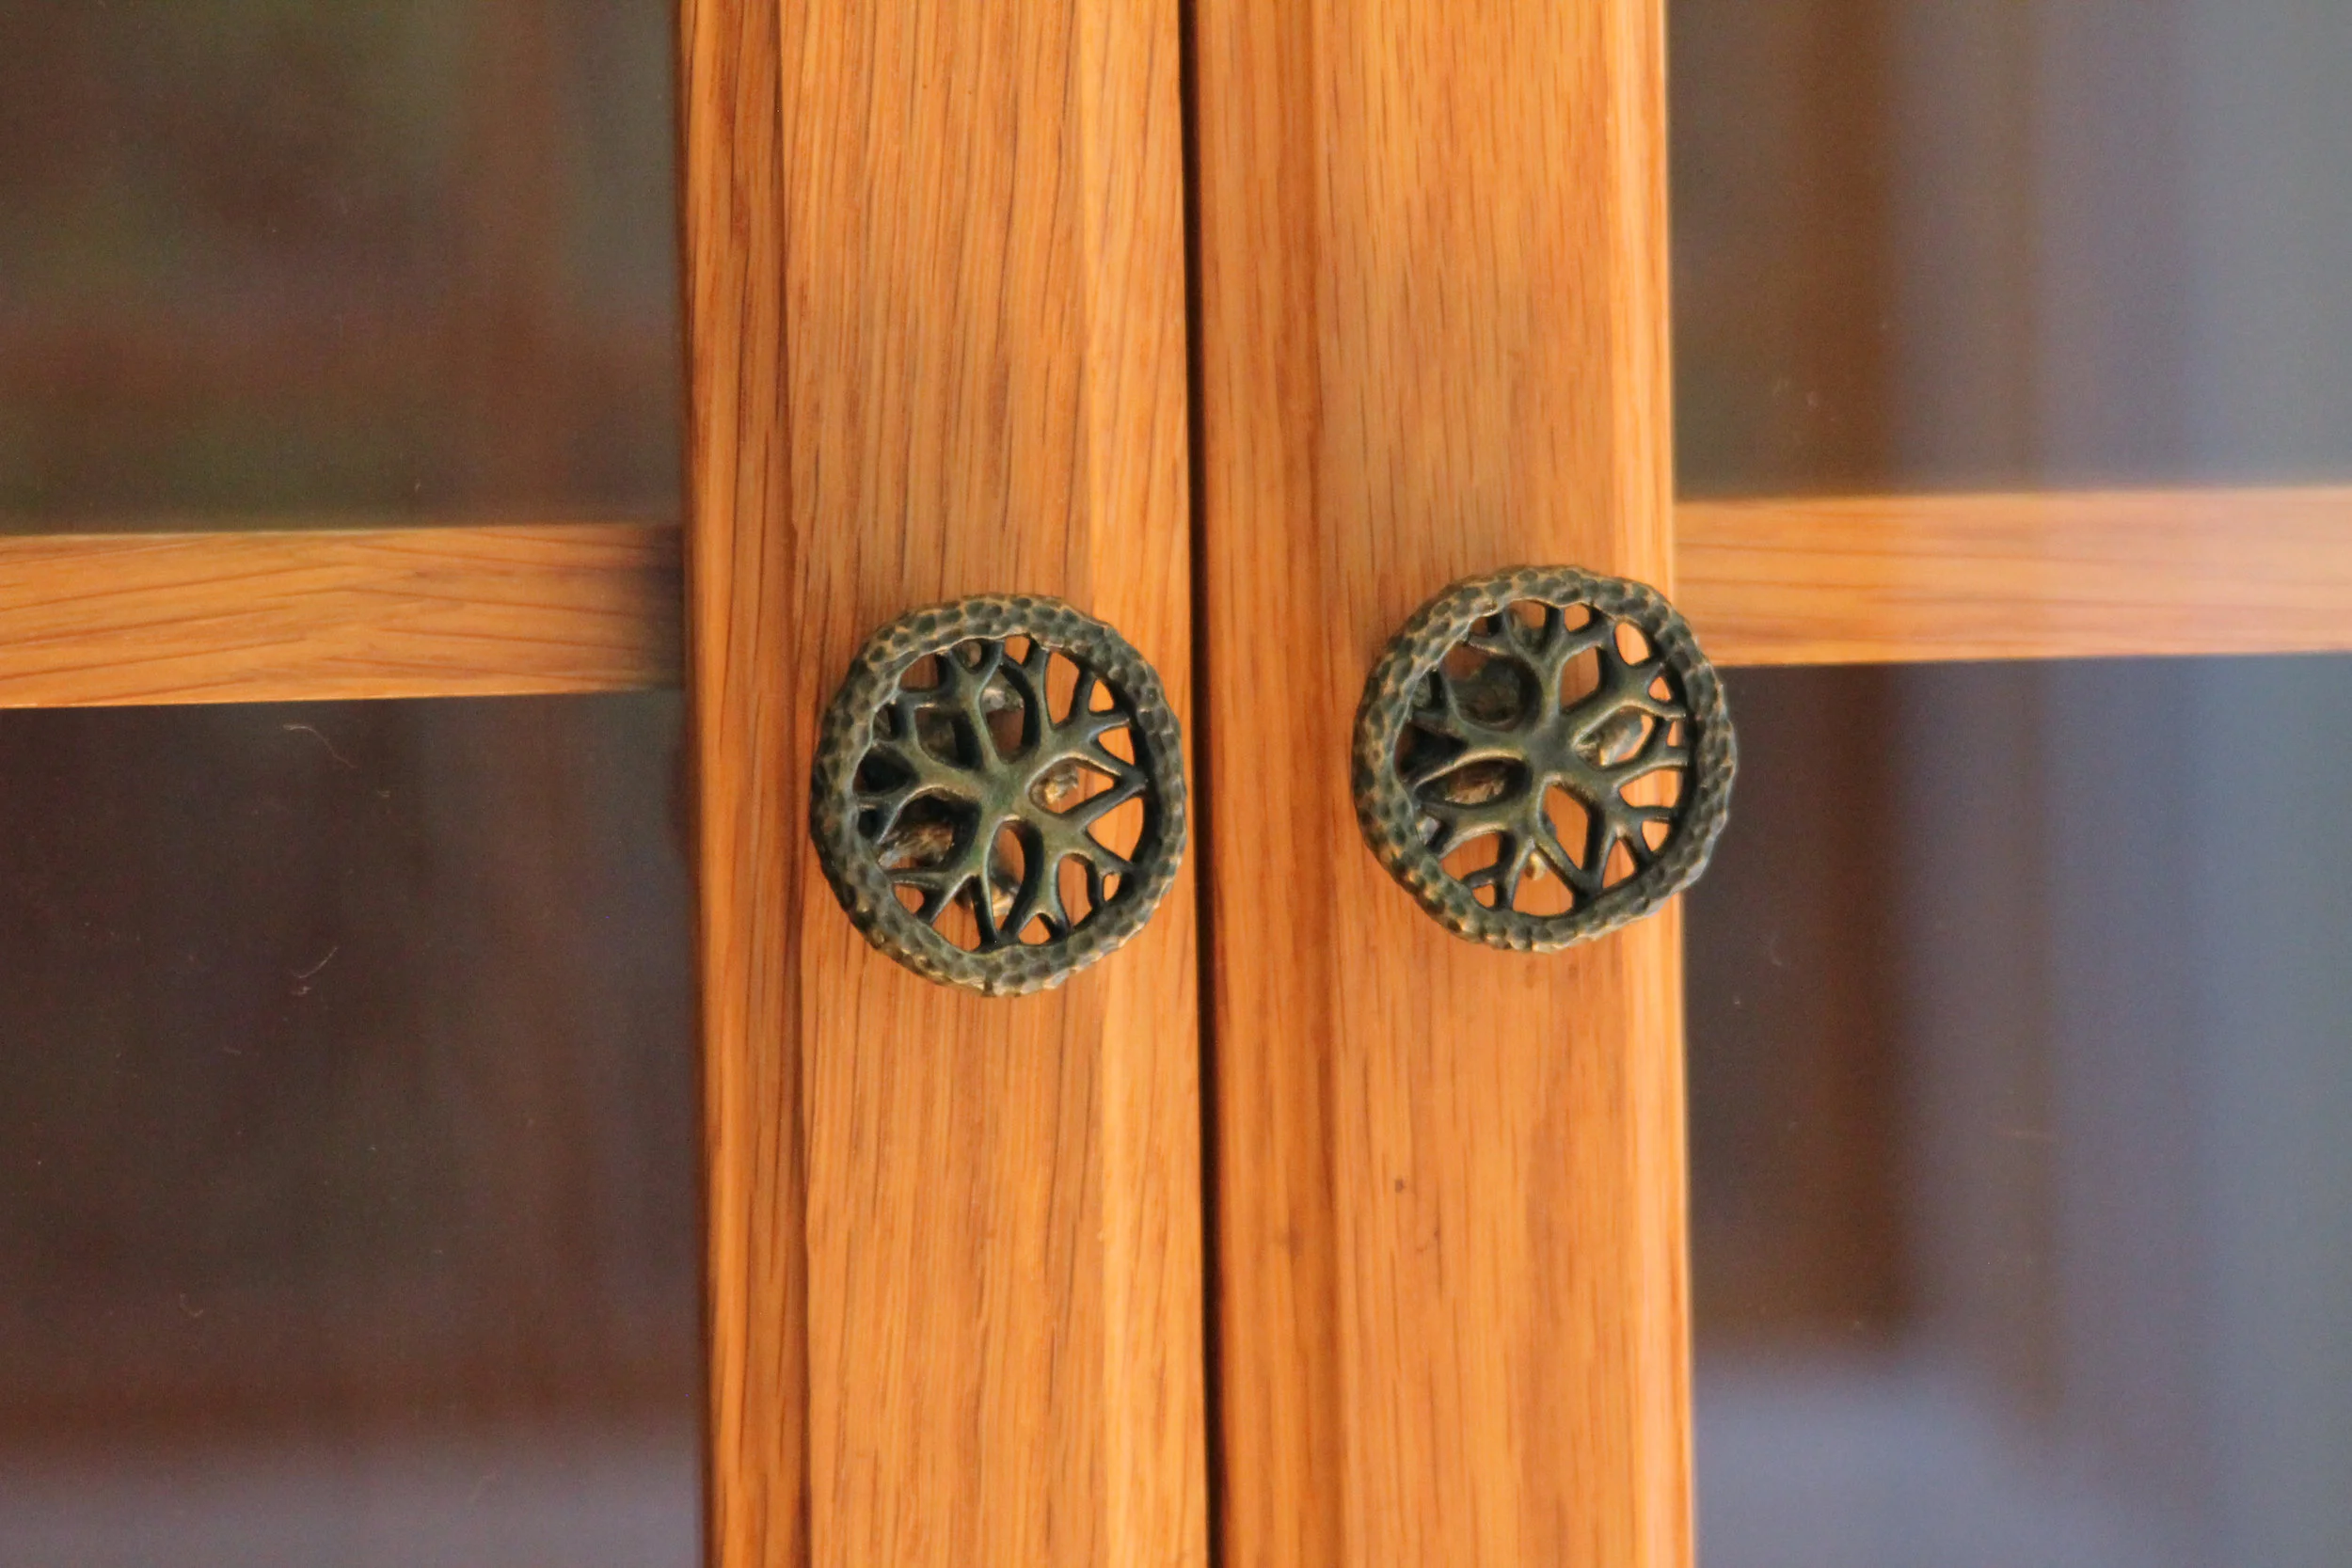
The client had planned for the fact that cabinet doors are directional and can be either left or right handed and he creatively chose a design that could be inverted to make either a left or right pull. As the budget was limited this was a relief as we had only one tool for the larger J’s and the smaller double JJ’s.

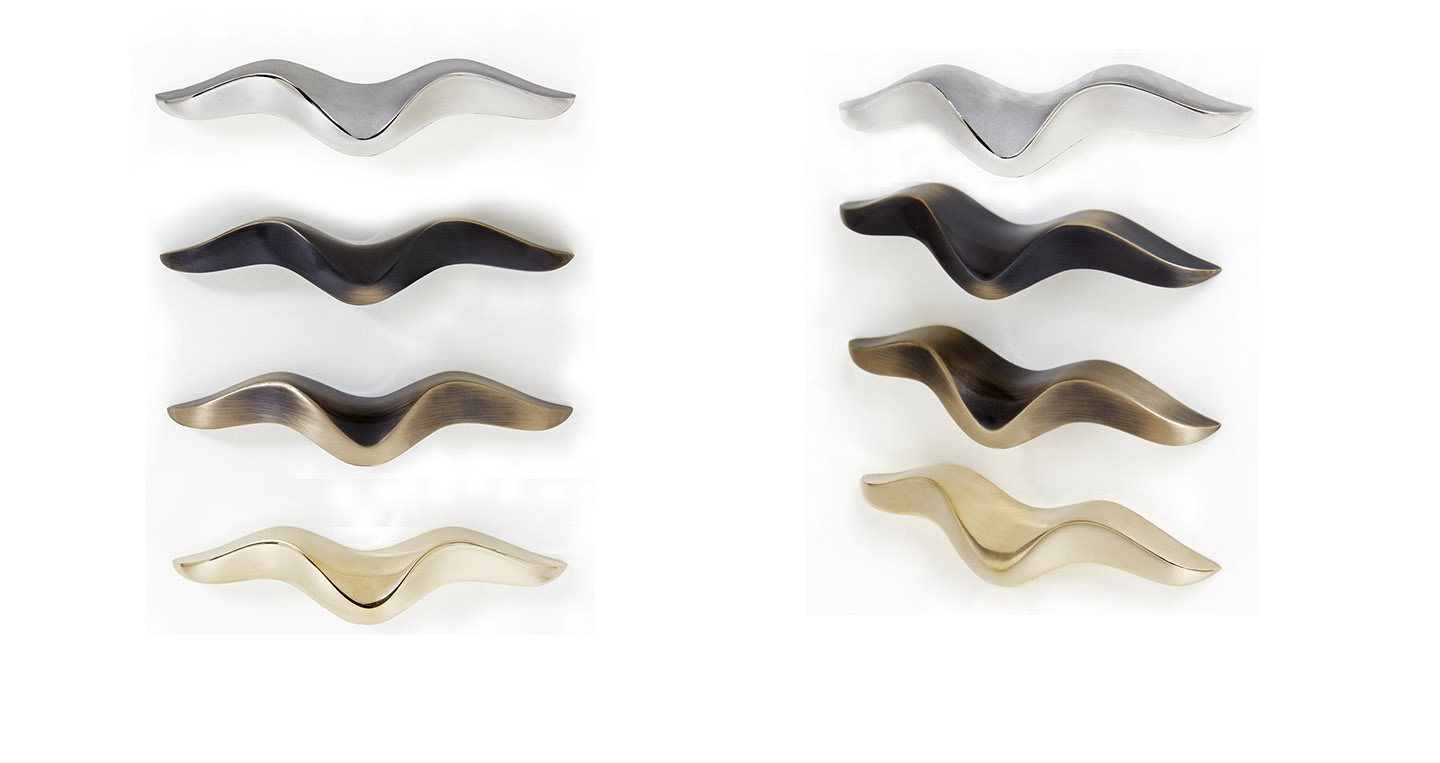
The cabinet pulls were cast in stainless steel and were brushed by hand for a simple but chic look.

We made a total of 80 pulls from start to finish in 12 weeks.


Unique Metal Door Pulls - Influence of Medium and Luster

Our contemporary door handles, Morphic and Ergo are usually seen in a polished or satin or 2 tone finish. Each finish can give a different aesthetic to the same handle allowing the same handle to be employed in different areas to different effect.


These 2 modern collections of door handles can be cast either in bronze or in stainless steel and the appearance and mood is very different. When you add the textural layer from smooth, to satin to brushed you achieve even greater scope of use.

Consider the Ergo heroic pull as shown here.

The Ergo pull shown on the left is cast 316 stainless steel while the image on the right is silicon bronze. Both were cast using the same mold and by means of the lost wax method of casting. Both metals are resistant to corrosion but the stainless steel is more easy to maintain without the need for any type of sealant. By comparison the bronze unless sealed will tend to become more yellow over time.

As the Ergo handle is extremely fluid with deep recessed areas it lends itself to a sophisticated 2 tone finish. In the detail photo shown below different facets of the handles have been polished or sand blasted to create contrast and depth.

Ergo 2 tone bronze steel .jpg

Write here…

Compare the top sand blasted section of the steel wave to the same section of the bronze version.


Unique Metal Door Pulls - Influence of Medium and Luster

Our contemporary door handles, Morphic and Ergo are usually seen in a polished or satin or 2 tone finish. Each finish can give a different aesthetic to the same handle allowing the same handle to be employed in different areas to different effect.


These 2 modern collections of door handles can be cast either in bronze or in stainless steel and the appearance and mood is very different. When you add the textural layer from smooth, to satin to brushed you achieve even greater scope of use.

Consider the Ergo heroic pull as shown here.

Ergo bronze and steel.jpg

The Ergo pull shown on the left is cast 316 stainless steel while the image on the right is silicon bronze. Both were cast using the same mold and by means of the lost wax method of casting. Both metals are resistant to corrosion but the stainless steel is more easy to maintain without the need for any type of sealant. By comparison the bronze unless sealed will tend to become more yellow over time.

As the Ergo handle is extremely fluid with deep recessed areas it lends itself to a sophisticated 2 tone finish. In the detail photo shown below different facets of the handles have been polished or sand blasted to create contrast and depth.

Ergo 2 tone bronze steel .jpg

Write here…

Compare the top sand blasted section of the steel wave to the same section of the bronze version.

Ergo wave bronze and steel .jpg


Kitchen Design Inspired By Trees

When we decided to remodel our 1926 kitchen we were able to tap into our experience as furniture and cabinet makers which gave us access to local lumber yards, wood finishers and wood duplicating machines. As a wood carver Martin was able to create two unique tree patterns that were then reproduced by a wood duplicator to create multiple tree feet for the cabinetry.

scenice tree.jpg

A wood duplicator is a machine that works rather like a pantograph. Duplicators vary in terms of the number and size of multiples they can reproduce with the output ranging from 8 to 24 units. A series of routers are connected to act in unison so that multiple blocks of woods can be cut all at once and uniformly. The wood pattern that Martin carved was used as a master template and guide to be followed by the interconnected routers with each station creating one copy. Two patterns were made one for the center cabinet feet and a second right angle design for the corner legs.


The choice of hardware was key to the overall kitchen design and the tree motif is what ties the cabinets to the pulls and knobs.


The Hedgerow cabinet pull collection has a large left and right large facing tree that worked well for upper cabinets and for the glass door to the butler’s pantry. For the lower drawers the Hedgerow branch pull worked well and the small round cabinet knob was useful for the  bi-folding  cabinet doors as well as the smaller upper doors. 


As the original red oak floor was  in excellent condition we chose the same species for the cabinetry and finished the hardware with a simple oil rubbed finish.

Unique Turn Pieces

A turn piece as its name hints is a piece that is used to turn or activate a deadbolt thereby locking or unlocking a door. While the turn piece performs a modest task, there is no reason why the design needs to be plain and attention to this small detail can be the defining touch to an entry door.

When we design a style of door hardware we create a specific decorative turn piece as one element in the collection and often employ a sense of whimsy in the design. However, as the turn piece plays a critical role in opening and locking the door, artistic restraint needs to be used so that the piece can be gripped and turned easily.

The decorative component must also fit within the cap of the turn piece so that the spindle can freely turn to release or throw the deadbolt.

At present we have 6 different turn pieces which were designed for different styles, but which can be used interchangeably as they all use the same spindle.

Hedgerow

The turn piece is a stylized miniature tree top canopy like the tree tops used on the Hedgerow lever.

Willow

The turn piece is a tight cluster of interwoven willow leaves and picks up the theme from the rose that it is mounted on.

Lizard

While the texture of bark is used in the lizard collection for the larger escutcheon plates the small “Y” shaped turn piece lent itself to a leafier stippled appearance.

Bee

The bee’s turn piece is a closed wing beetle a piece that also naturally compliments the frog and lizard entry sets.

Ergo

The turn piece is twist of metal designed to be easily fit the thumb and index finger.

Grapevine

Tightly entwined willow leaves create a small oval turn piece that compliments the willow rose.


How a Door's Stile Can Influence Your Style of Door Hardware

Yes the pun is intended this is not a typographical error. For doors that have a raised panel or glass panel, the flat unencumbered surface has a direct impact on the size and style of the door handle back-plate or escutcheon. The stile will also impact the back-set of the latch that is being used with the door handle whether it be a passageway or privacy latch.

What to measure?

You will need to measure both the outside width of your back-plate and the net width of your door stile, meaning, the flat area that is free of any molding or beading. You will also need to consider the door stop which is typically part of the door jam and which will overlap the door stile when the door is closed.

When measuring a decorative or asymmetric back plate or one that is uneven we suggest taking the measurement from the reverse flat side.

Where to position the escutcheon on the door stile?

To center or not to center the decorative trim will determined by factors discussed above and by the differing back-sets offered for tubular versus mortise latches. The back-set is the distance measured from the edge of the door to the center point of the lock and these are available at  2”, 2 3/8",2 ¾”, 3”, 4” for tubular latches and at 2 ½”, 2 ¾” for mortise latches. Narrower 1 ¾” and deeper 3”-5” back-sets can be found but usually are custom made.

Working examples

Interior Door with a 4 1/2” stile and with a 3/8” door stop using a back plate that is 3” wide. The center point of our door is 2 ¼” and center of our escutcheon is 1 ½ and the nearest back-set for a tubular latch which would position the trim at just over center point is a 2 3/8" back-set. The trim would be almost centered (1/8" off center) but  it would yield a  1/2" clearance from the edge of the plate to the door stop. If we used a deeper 2 3/4" back-set latch then our trim would be off center by 1/2" and a narrow 2" back-set would bring the trim too close to the stop with a mere 1/8" clearance.

 Patio Door with 5” door stile and 3/8" door stop and 3” back plate would have corresponding center points of 2 1/2” and 1 ½” so would work with tubular latch back set of 2 3/4” or a mortise latch of 2 3/4”. In the image below you can see how this would look with our lizard door lever set.

Lizard lever and knob on door stile.jpg

Levers ,Knobs and Handing

While the door stile will largely determine the maximum width of your  back-plate and how it will be centered on the door, the handing of the door and whether you use a door knob or lever should also be considered. Door levers pivot away from the edge of the door and can be operated with less hand engagement than knobs which tend to be enveloped by the hand making knobs more problematic for door jams that have wide door stops.

Useful resource – a client recently referred me to a Canadian site that provides a very helpful checklist worth reviewing if you are planning to mix styles and mediums in your kitchen remodel.


3D Printing as useful tool in casting custom door handles

 Casting a custom door handle requires an understanding of the shrinkage that occurs in traditional lost wax casting. When casting in bronze or steel the process starts with a pattern often sculpted by hand in wood or clay but with the advent of 3D printing we are now in some cases able to produce this as a Quick Cast  stereolithographic print (SLA). While these 3D prints are useful in developing prototypes they still need to be finished by hand and are often too expensive to be used as wax substitutes since they too are burnt out and wasted in the lost wax process.

3D prints have their place as prototypes and for custom short run projects where the cost of developing a mold or tooling cannot be amortized over a large enough quantity to make the project cost effective.

Recently we considered 3D printing as a protype tool in helping to create a left and right pattern for a short run project of 4 sets of door handles. When developing a new handle set we often break the design down into component parts and where there is a directional detail this means we must make 2 patterns one for left and one for the right facing section. 3D scanning and modeling allows us to use one carved pattern to create a second mirror image model that is printed in a resin compound. While this reduces the development cost, the digital print often needs to be re-carved so that very fine details like leaf veins and scales can be sharpened by hand.

The picture below of the Hedgerow door lever shows that the branches of this piece are very directional thus requiring a left and right mold, but the canopy is generic to both levers.

Hedgerow lever left right.jpg


One advantage that SLA’s have over wax patterns is that they are not subject to shrinkage. In lost wax casting shrinkage occurs when the molten wax solidifies and when the bronze or steel casting is poured. There are a wide variety of waxes used in this process and their composition effects how they pour, how they solidify and how much they shrink. While a wax pattern may shrink by approximately .6% no shrinkage occurs with the print.


Trying to mathematically predict the exact amount by which the wax pattern and subsequent casting will shrink is difficult when developing a new piece. If the dimension of the piece is critical then we will often create a mold and wax of a smaller section so that we can exactly determine the overall shrinkage and can then re-scale the complete piece making it and the subsequent mold large enough to compensate for this shrinkage.

Art Nouveau and Victor Horta a design inspiration continues

We have just returned from Brussels, home of the renowned Art Nouveau master, Victor Horta and showcase to many of his works. While many of Horta’s prized works are privately owned and not always available for public viewing, Horta’s personal residence and studio are now open to the public as a museum. Located at 25, rue Américaine the museum spans 2 buildings and by walking up the curvaceous fluid carved stairwell from the lower kitchen to family rooms to bedrooms one experiences an intimate view of life in the Horta household. The central staircase is carved in mahogany and the newel post and handrail which begin as separate carvings come together in a dramatic and organic sweep to form one single functional work of art. Alas, the policy of the museum did not permit photography and while the official guide book does contain pictures they do not do justice either to the brilliance of the design or to the outstanding craftsmanship.

Horta House sm.jpg


The museum allows one to experience the completeness  of Horta’s style from hand painted tree friezes, to  whiplash brass hinges, to flower petalled stained glass, all are designed to become a  holistic expression of nature as seen through Horta’s eyes.

As an architect Horta’s studio provided the training ground for others, notably Gustave Strauven who worked as his apprentice before designing maison Saint-Cyr. When we first saw the extravagant façade of this building we mistakenly though it had been designed by Horta but on closer inspection it was clear that the metal filigree lacked the restraint and arguably sense of balance that marks Horta’s work (compare the left  and center images at top of page).

Bronze Door Set by Horta note the discreet keyed cylinder

Bronze Door Set by Horta note the discreet keyed cylinder

We began our appreciation of Horta many years ago when Martin was commissioned as an artisan to fabricate mahogany archways for basketball legend Kareem Abdul Jabbar but it has been a remarkable experience to see Horta’s work up close.


Art Nouveau a lasting inspiration

We have written about our love of Art Nouveau and are now taking a trip to Brussels in homage of Victor Horta, one of the pioneers and master of this organic and fluid style of architecture. We left England in the 80’s with an appreciation of the French masters in this field but did not become familiar with the Brussels legend until meeting Kareem Abdul- Jabbar also a legend and an Art Nouveau enthusiast. Martin was hired to fabricate the entry door, interior doors and stair rails for his Bel Air residence. When we arrive in Brussels and see Horta’s work in person we will share this experience in a later post. Meanwhile I want to focus on this local residence where the styles of Horta, Guimar and Mucha came together to create a splendid home.

Kareem-bel-air


The front door was carved from Honduras mahogany as a collection of over-sized irises in a style reminiscent of Alphonse Mucha’s colorful posters. The interior of the front door borrowed its direction from Guimard but for the main archways and interior doors the whiplash center of the casement molding and tweezed hair design of the corners are much truer to Horta’s work.

Kareem


Horta’s aesthetic can also be seen in the large interior doors especially where wood meets glass and the birds eye maple panel is bisected by a central astragal carved as a budding tendril.

Kareem 3.jpg


The stair rail was made in sections of solid bronze using a cow parsley pattern carved by Martin and based on the floral works of Mucha.

Kareem 1.jpg


Orchid cabinet pulls - from wooden origins to bronze gems

As any orchid lover knows, these seductive clever plants have over time developed both their beauty and ingenuity to lure pollinators. The color and shape of each family type is used to seduce particular types of pollinators to them, be they bees, birds, moths or flies. The bright colorful orchids use their red, yellow and orange patterned flowers to attract day time pollinators while browner duller orchids use their powerful scent, not always pleasant, to attract nocturnal visitors like moths. Orchid families are further defined by their shape and this too determines the type of pollinator. The Cochiloda family for example has a narrow long lip that is easily accessed by the hummingbirds’ retractable tongue. By comparison the Cypripedium family have a flattened rim to their bulbous lips which makes a prefect landing spot for bees and insects.

Orchid and Black Bee square.jpg

Orchids have always been one of Martin’s favorite plants and back in 1979 he sculpted an oversized 3’ sculpture with an imaginary orchid carved in cherry wood and with a realistic bee carved in ebony. More recently Martin has created a more realistic bronze orchid flower and stem as cabinet pulls. The orchid flower, while relatively small is one of our most difficult and time-consuming pieces to make. Based on the anatomy of the Phalaenopsis family the flower has 3 sepals, 2 petals, a protruding lip and a central column. To do justice to the detail and depth of the orchid, the flower is cast from 3 molds to create 3 castings, one for the sepals and petals, a second for the bulbous lip and a third for the inner column. When making a sprig of orchids a total of 7 individual castings are welded to create this 8” wide pull.

Orchid anatomy.jpg
Orchid construction.jpg

For a more in-depth analysis of how different orchids and their pollinators have adapted to each other over time to create a mutually beneficial relationship follow the link below.

Modern Entry Door Pulls and their accessories

The Morphic cylindrical pull, as is the nature of most entry door pulls, is used as a door grip and not as a door lock. While this entry door pull works well both stylistically and practically with the Ergo keyed cylinder and deadbolt trim, the cylinder lock in this configuration has been manual rather than electronically operated. With the introduction of our LED colored version we are now designing a trim set to compliment the fretted lace design of this piece. While the trim will ultimately work with an electronic lock we will be ironing out casting bugs with a trim for a manual lock before deciding which electric locks to make our trim compatible with. As we assess suitable smart locks we will be weighing the advantages of hard wired versus battery operated units and whether to us a simpler keyed cylinder deadbolt versus a more heavy-duty mortise lock. We are open to suggestions so do email us with smart locks that you favor.

Keyed cylinder trim.jpg


The new Morphic keyed cylinder deadbolt is shown below as a concept in two tone polished and satin stainless steel and in 3 powder coated colors. It may be that with the subsequent electric trim we would incorporate an illuminated trim to tie in with color of the illuminated cylinder and if so then we would use an opaque diffuser, we will keep you posted as these concepts take shape. The Morphic and Ergo collections are typically specified in stainless steel but they are also available in oil rubbed bronze.

Baroque carving a training ground for nature inspired door handles

The Willow collection of custom door handles in part owes its existence to Martin Pierce’s early training as a wood carver. On leaving school at 16 he served an apprenticeship as wood carver and finisher and spent countless hours carving acanthus leaves, oak leaves and acorns as decorations for reproduction baroque furniture. The training was invaluable in developing carving and drawing skills and for focusing his awareness on leaf styles and movement in nature.

As a free-lance wood carver, Martin was able to reflect nature in a less stylized manner and he began sculpting trees and leaves with more fluid lines. As an antique reproduction carver Martin’s work was limited by the formality of each period he was copying. As a hardware designer and pattern maker his work is now constrained by the practical needs imposed by door hardware. In this composite shot you can see how the same willow leaves have been sculpted to act as small tight easy to hold knob for door bolts and how the same leaves have been carved as a looser vortex of flowing leaves to make a large entry door knob whose purpose is largely decorative.

The pattern for the center of the Willow leaf vortex  was carved in basswood and then painted with a grey primer to conceal the grain and pores of the wood and too create a smooth surface for reproduction in wax (red image). The wax replica is made by creating a mold from the pattern and it is approximately 4% smaller than the pattern.

Willow Pattern vortex.jpg

Large Exterior Doors Pulls - A Contemporary Style in Demand

The demand for large door pulls as entry statement hardware continues to thrive in the hospitality sector. The Ergo collection of contemporary entry door handles began modestly with the Heroic handle, ergonomically sculpted as left and right handles but still substantial at a height of 19” and girth of 1.75”.

The sequel was aptly named Epic but in the size contest has been relegated to second position with the arrival of Mega which has just been released at a height of 54” and hand friendly diameter of 1.5”.

Mega Ergo is cast here in Los Angeles using the lost wax method of casting and is cast either in solid stainless steel or investment grade silicon bronze. The length, fluid shape and complex curves of Mega created challenges that lent themselves to this method of investment casting. The original pattern was carved by hand in 2 sections that were mirror images of each other, essentially a left and right section that together create a single non-directional handle and one where the bowed central grip can be pointed inwards or outwards depending on door jamb restrictions. The size of  Mega at 54”  is too great a length for the molten metal to flow smoothly without cooling so 2 molds are used to create wax replicas of the left and right half of the pattern. The wax replicas are “shelled” and then  fired to create a hard ceramic casing. The fired pieces are then placed in an autoclave to remove the wax which is “lost” and molten metal is poured into the hollow cavity of the ceramic shells. Once the 2 sections have been cast they are welded by hand to create a seamless fluid handle.

This process is obviously labor intensive and time consuming but as we can make the handle in wax sections we can fabricate longer innovative handles and meet the artistic needs of designers looking for statement pieces for public spaces.


Cabinet Pulls in Brushed Steel and Brushed Bronze

We have in previous posts discussed how to create colorful patinas and oil rubbed finishes on bronze hardware, but we are often asked to create more understated finishes and are able to do so by brushing or sand-blasting or polishing the surface of the piece.

While the Ergo cabinet pull is contemporary in design it takes on a jewel like appearance when highly polished and becomes subtler when brushed or sand blasted to a low luster.  As with most of our cabinet hardware this cabinet pull can also be ordered in silicon bronze which is a warmer golden toned alloy. Natural bronze, like stainless steel can also be highly polished for a mirror finish or brushed for a subtler effect.

Once the right amount of luster has been achieved color and highlights can then be added either by creating textural tones with polished and non-polished areas or by applying colored patinas to all or part of the cabinet pull.

In the group photograph the Ergo pull is shown in 4 quite distinctive finishes. The top view shows this 7” wide piece cast in stainless steel and finished in a two-tone luster with the face highly polished and the balance in a softer fine sand blasted finish that accentuates the shape of the wave design. The bottom picture shows the pull cast in silicon bronze and finely brushed. The center pictures demonstrate how the bronze tone can be developed from a light antique to an almost iron black finish using cold patinas that are sealed in place using with oils applied with a soft fine cloth.

Color Changing Door Handles

We have just changed our profile photo to a collage image of colored door handles taken from our Morphic and Coral styles of door hardware. Our illuminated handles began with the introduction of low voltage LED lights into our Morphic cylindrical handles. To do so we had to solve the problem of how to incorporate a hard wired LED spot into a cylindrical handle the smallest of which has a mere 1.25” internal diameter.  As the cylindrical handle is vertical and as the design is open we could not use a strip of LED lights but needed to work within the confines of a small downward projecting light with a narrow 10 lens that would center rather than diffuse the colored beam.

The cylindrical handles range from 16” to 32” in length and are available either with a single color constant voltage LED spot with built-in driver or a color changing constant current spot.

The profile collage also shows the illuminated Coral handle which is one of 3 panel style door handles These are also color changing handles but are lit using multiple diodes encapsulated in a weather proof flexible strip that fits into the inner perimeter of the handle.

Both types of door pull are made using the lost wax method of  casting and  are available in bronze or stainless steel and are UL listed.

What determines the direction of a door handle

For many the question of a door handles direction is seen as a question of door handing and not a question that has much to do with design and possibly whimsy.  While it is true that the handing of a door lever is determined by the location of the doors hinges this need not always apply to door pulls or door grips. The answer is further complicated when the designer, in our case, Martin Pierce has a keen sense of what is correct from a natural perspective. This recently came up in a conversation with James Cunningham a photographer who we recently worked with to enhance the background of our Morphic Scroll door pull. The scroll pull is clearly a vertical pull but the curved grip can just as easily face outwards or inwards. Martin designed the piece for the Baha Mar project in collaboration with Mike Hong the projects architect. The   concept drawings have always shown the piece with the curve pointing outwards but this is not how James Cunningham saw it.


There are some door pulls where it is up to the artistry of the designer or consumer to determine the best direction for a piece.


Then there are the practical aspects to consider - when a door stile is narrow while the width of the grip may fit the space it may be wiser to have the grip face away from the door jamb as this will reduce the risk of grazed knuckles that would occur if the grip direction were reversed.


Tree Door Handles - when to through bolt

The Hedgerow tree handles are made either as large scaled heavily canopied door grips or as smaller door pulls. When they were designed we had planned the larger 19” handle to function as an entry door handle and its smaller cousin as a 9” cabinet door pull.

The different functions impact how the tree is mounted as cabinet pulls are typically mounted through the back of a cabinet with a wood screw that is screwed into the back of the threaded and taped tree. Occasionally the smaller trees are surface mounted as was the case recently when they were mounted on a wall and used as decorative fixtures for curtain ties

The small tree is increasingly been used as door pull for smaller interior  doors where its scale is more appropriate or on wood framed glass doors where a lighter handle is preferred. When used as an interior door both sides of the door are seen and so 2 trees (a left and a right) are used. The 2 trees are connected with a custom bolt one end of which is welded to the tree while the other passes through the door into the back of the second tree where it is held in place by 2 discreet Allen screws (set screws)

Through mounting works equally well for larger entry door grips though for added security the welded bolt should be attached to the exterior handle thus preventing its removal by someone equipped with the necessary Allen wrench.

Yacht Door Handles in Polished Steel

The fluid design of the  Morphic door handle is increasingly being specified for yachts and oceanic projects in a  highly polished finish. The mirror like finish compliments these watery locations and as it is cast in stainless steel it has excellent rust resistant properties. The physical durability of stainless steel also makes it ideal for high traffic public areas which are the norm in the hospitality industry. We have recently completed 12 sets of our Serpentine handle for a new yacht designed by SMC a  London based group that leads the field in maritime design.

Working closely with the projects specifiers, DEKO Ocean of  Denmark, we made necessary modifications to ensure that the handles would work for the projects 3” deep aluminum fire doors.

Coincidentally the Morphic style chosen for SMC’s project is one that owes its inspiration to marine life forms and in particular to the lace like appearance of  coral and to the tentacles of squid and octopi. Despite its oceanic origins  we named this piece “Serpentine” to more immediately convey its shape and to set it apart from other pieces in the series.

The Serpentine handle measures 31”H by 4”W ( 812mm x 100mm) and is suitable for most wood, glass and stone doors. The handle is mounted over a small concealed mounting bracket that is attached to the door. Once the bracket is firmly in place the Serpentine handle then clips over the bracket where it is held in place by Allen screws on either side of the handles tips.

Tiger Illuminated Door Handle

Tiger Design for Illuminated Door Handle latest piece from Martin Pierce

The new Tiger Illuminated Door Handle has now been released into the wild or at least that is how we sometimes feel about the internet.  We have in previous posts explained how the pattern was created with old world skills using a scroll saw and aluminum sheet to create a durable pattern for lost wax casting. We have now completed  our first stainless steel castings and using energy efficient LED strip lights have created a color changing and single color illuminated Tiger door handle.


As is the case with all of  illuminated door pulls, the Tiger panel is  directly wired  with 22 gauge fine wires that are fed through the door frame into the decorative door panel.  The power is typically delivered to the door through an electric hinge and then conveyed to the handle through a low gauge harness that comes with the fixture and is ready for connection to a class 2 power supply.  

The Tiger door pull is UL listed and is lit with a flexible weatherproof strip  and encased in stainless steel which is corrosion resistant and durable.

Tiger is the fourth  piece in our collection of  illuminated door handles which include  Fish, Coral, and Morphic themes.

Work is continuing on the Hedgerow new tree handles  but as with any new design of this size and complexity there have been quite a few challenges to resolve and as we are now incorporating LED lights and have a left and right facing handle we have had a lot to think through.

Other illuminated designs are taking shape in Martin’s sketch book so stay in touch to see these as they evolve.

How to make a simple mold for lost wax casting

Over time all things age and the longevity of a mold will depend on the composition of the mold material and frequency of use. We make a variety of  molds some require metal or fiberglass reinforcement and are not ideally suited for home use but others are possible to make at home provided you are patient and dexterous.

Our frog cabinet pulls are a popular item but we still make these by using a simple gravity pour rather than injection method to create the wax replicas for our lost wax castings.

The frog mold is a 2 part mold that is held together by simple peaks in one half of the mold and troughs in the other half mold that act as keys to tie the mold together. The troughs or holes are created using a drill bit or punch which is pushed into the modeling clay that holds the pattern in place. As this is a 2 part mold the skill comes in delicately building up the modeling clay up one half of the pattern without breaking of the small frog digits.

Once the frog is secure in modeling clay and all undercuts have been filled in we apply 3 or 4 coats of silicone rubber with a paint brush, we use Mold Max 30 by Smooth-on. After the silicon rubber is set we reinforce the mold with a more rigid plaster compound called Plasti Paste 11 by the same manufacturer.

stages of mold making .jpg

Next we make the second half of the mold which will have the peaks that align with the troughs. First we spray on a mold release agent onto the female mold, we use  Ease Release 200 by Mann Technologies. We then apply more of the silicon rubber to the mold which will collect in the troughs.  We repeat the process described and once we have created a rigid case in Plasti Paste we are ready to start using our mold to create waxes. The release agent allows the 2 halves of the mold to separate, we then can remove the pattern and now we have a hollow space to receive the wax.

Useful sources

https://www.smooth-on.com/

www.moldreleases.com