
Continuing on from my earlier post, our L2L garden project is complete and I can’t wait to do the laundry! The Grey water experts, aka Grey Water Corps, installed the system in less than 5 hours with remarkable skill and a good measure of aesthetic awareness. While the project was a low-tech plumbing operation the crew made sure that all the elbow joints were tight and sound and that all the pipes were unobtrusive and blended with the stucco color and wood tones of the walls and steps.
Step 1:
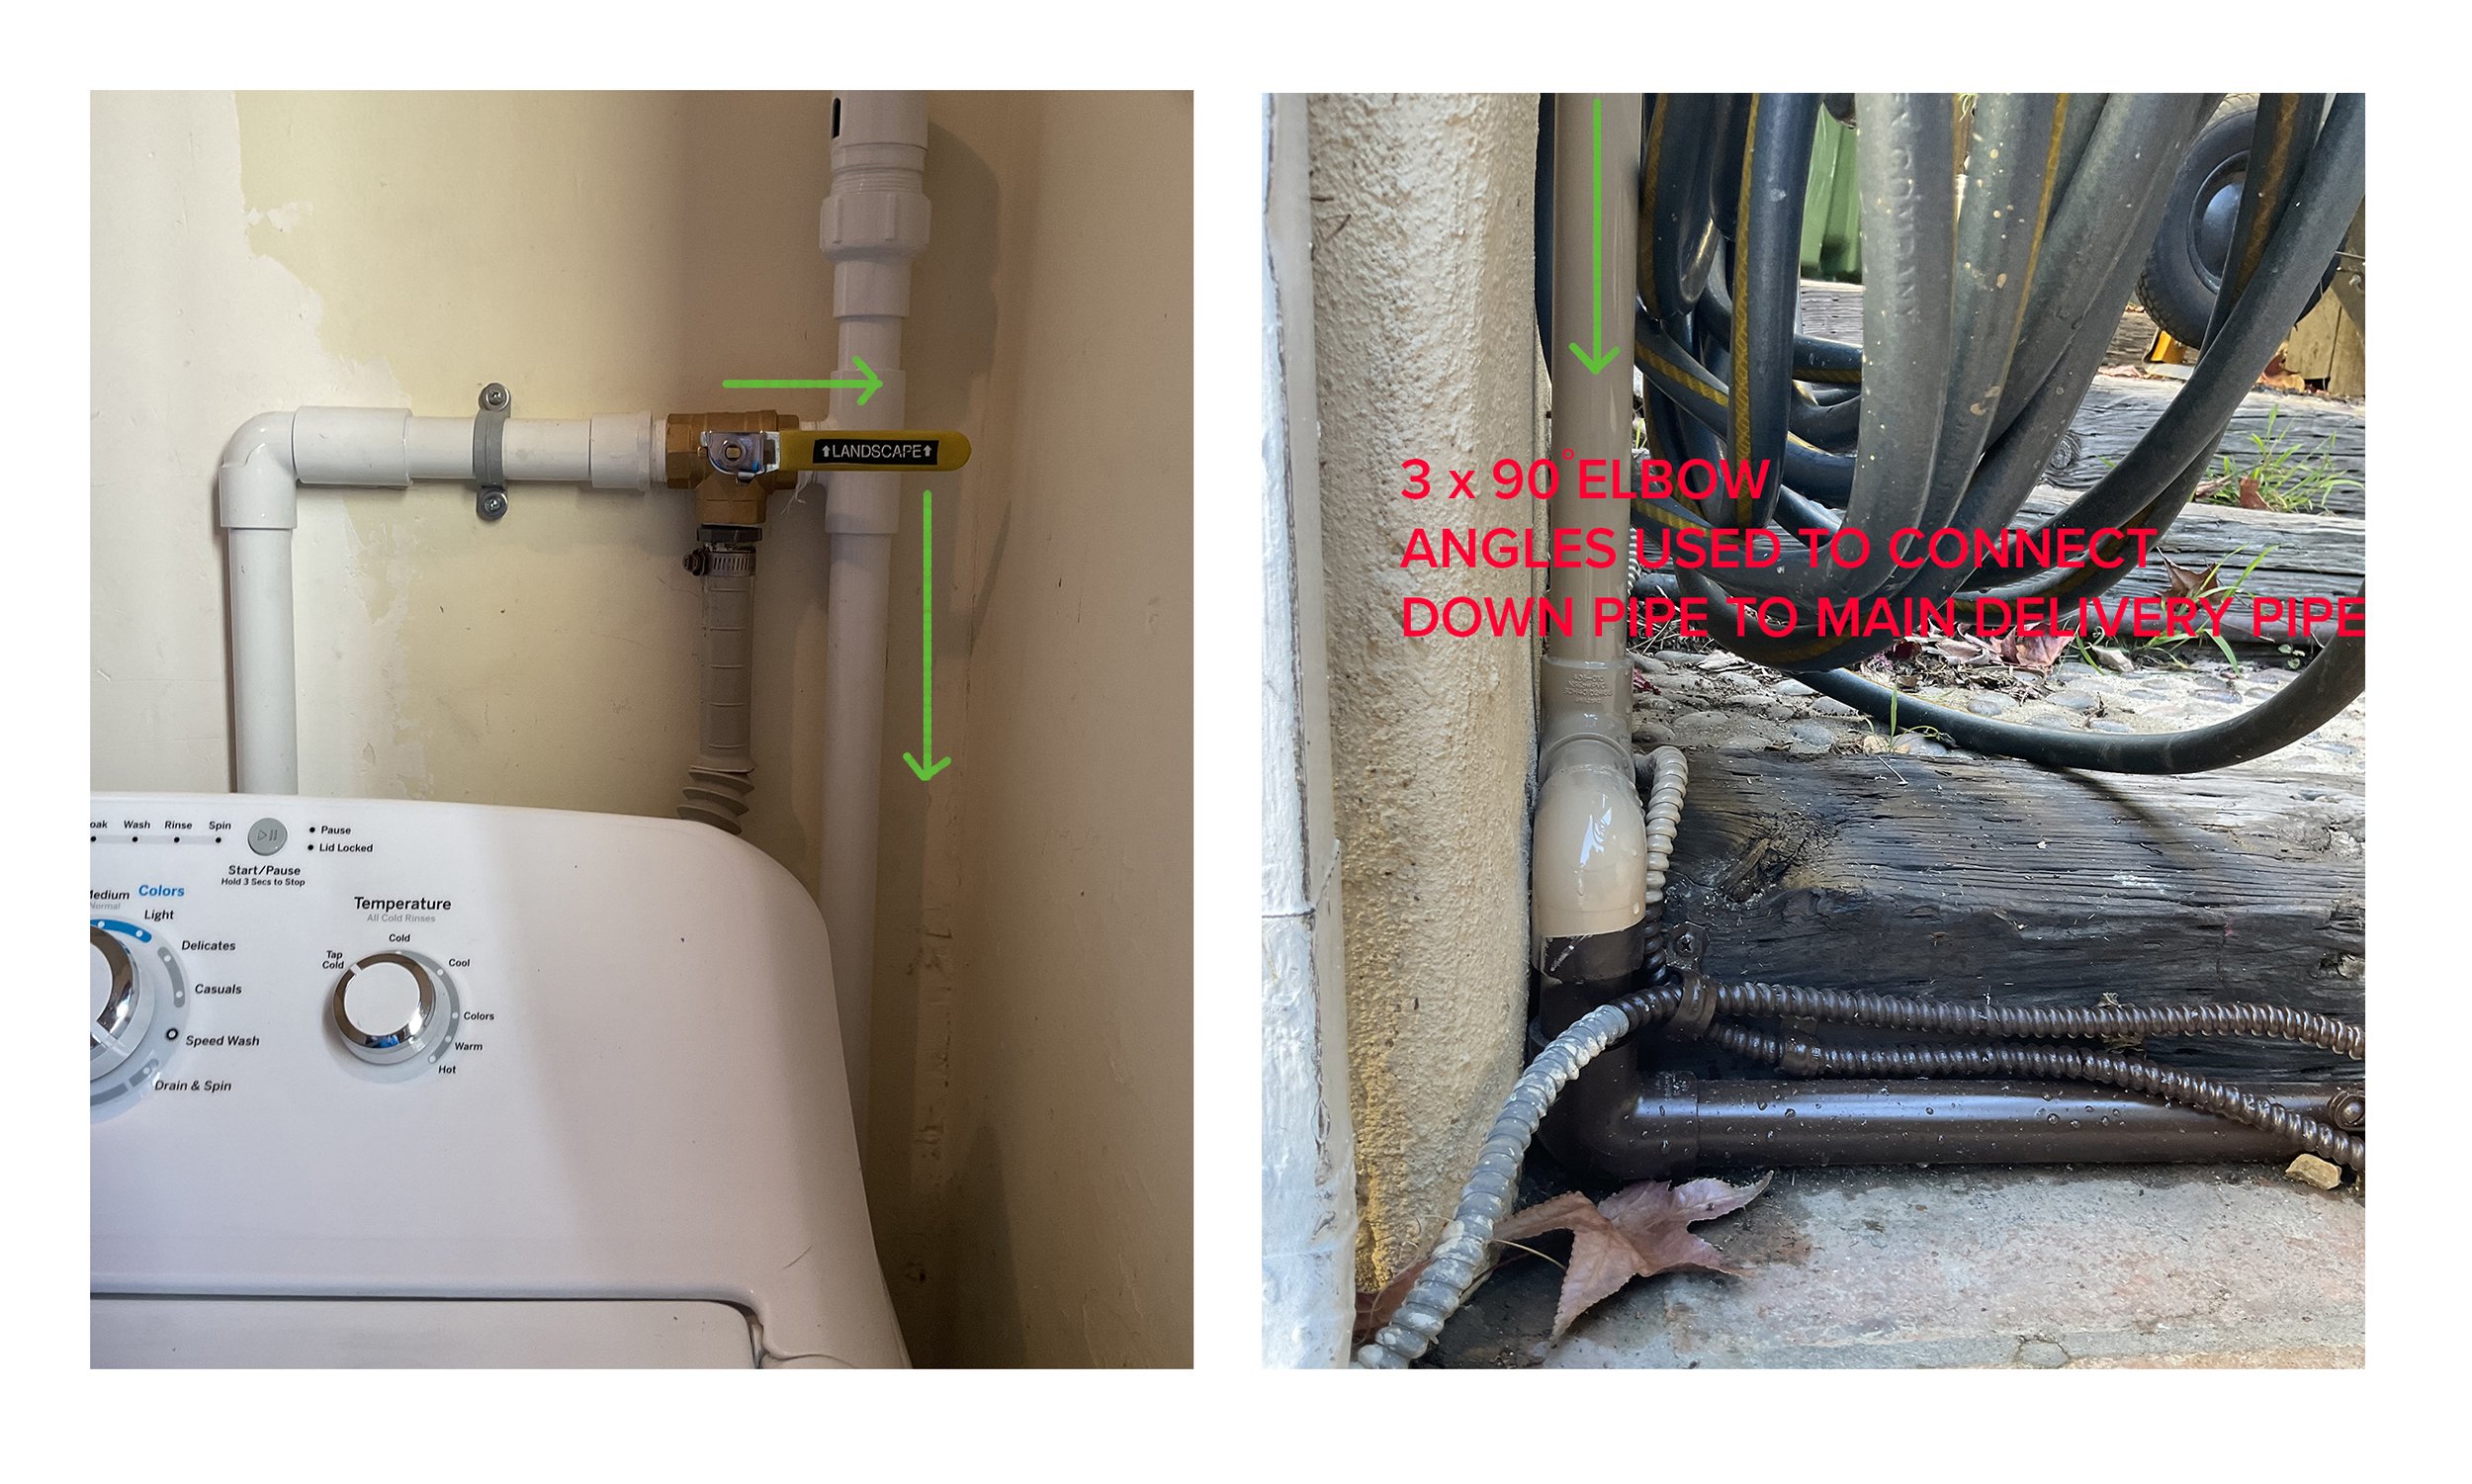
The washing machine waste water pipe was modified so that the waste grey water could be diverted for garden use. This was achieved by connecting a new plastic pipe to the existing pipe and channeling it downwards and through a small hole in the wall to the outside. A directional valve was added that allows the washing machine water to be directed either to the garden or to the sewer line, a useful item for those occasions when you may be using your machine with less plant friendly detergents. As I will be using salt free environmentally friendly detergents the valve will be set to landscape mode.
The washing machine motor is powerful and will push the water into the connecting pipe and into the outside down pipe where gravity does the rest. There is no need for an additional pump as Greywater Corp’s designed the system utilizing the grade of the garden to make maximum gravity flow.
Step 2:

The pipe from the washing machine having passed through the outside wall was connected to a down pipe which in turn was connected to the new irrigation delivery pipe. Each elbow joint was tightly fitted and firmly glued. The down pipe and connecting elbow joints were painted beige to blend with the stucco wall. The brown irrigation pipe was snugly fitted to the wooden step and then continued on to the outer edge of the garden.
Step 3:
The rigid brown delivery pipe was then connected to a flexible blue pipe that was buried in the soil and continued around the garden supplying grey water to each mulch basin via a connecting T fixture ( below). See above photo red box shows blue pipe painted brown to blend.

Step 4 – Step 1 chronologically

Each designated mulch basin, identified with a purple flag was dug to a depth and width of approximately 18”. A black collar was then installed to house the water valve and create a barrier that will stop excessive mulch and debris from clogging the valve mechanism. The collar sits inside the hole and was partially filled with mulch to conduct water down to the plant roots. The amount of water released is controlled by a simple valve at the end of the T connector. The area around the collar is filled with mulch that helps distribute water to surrounding surface areas by osmosis. Each collar is fitted with a cap that also serves to protect the valve.
The mulch used by Greywater Corp was fairly chunky so it will break down slowly but will need to be replaced or augmented in about 12 months.
Thank you Leigh,Danica,Trent, Russell,Clay and all the great people at Greywater Corps that made this project possible.