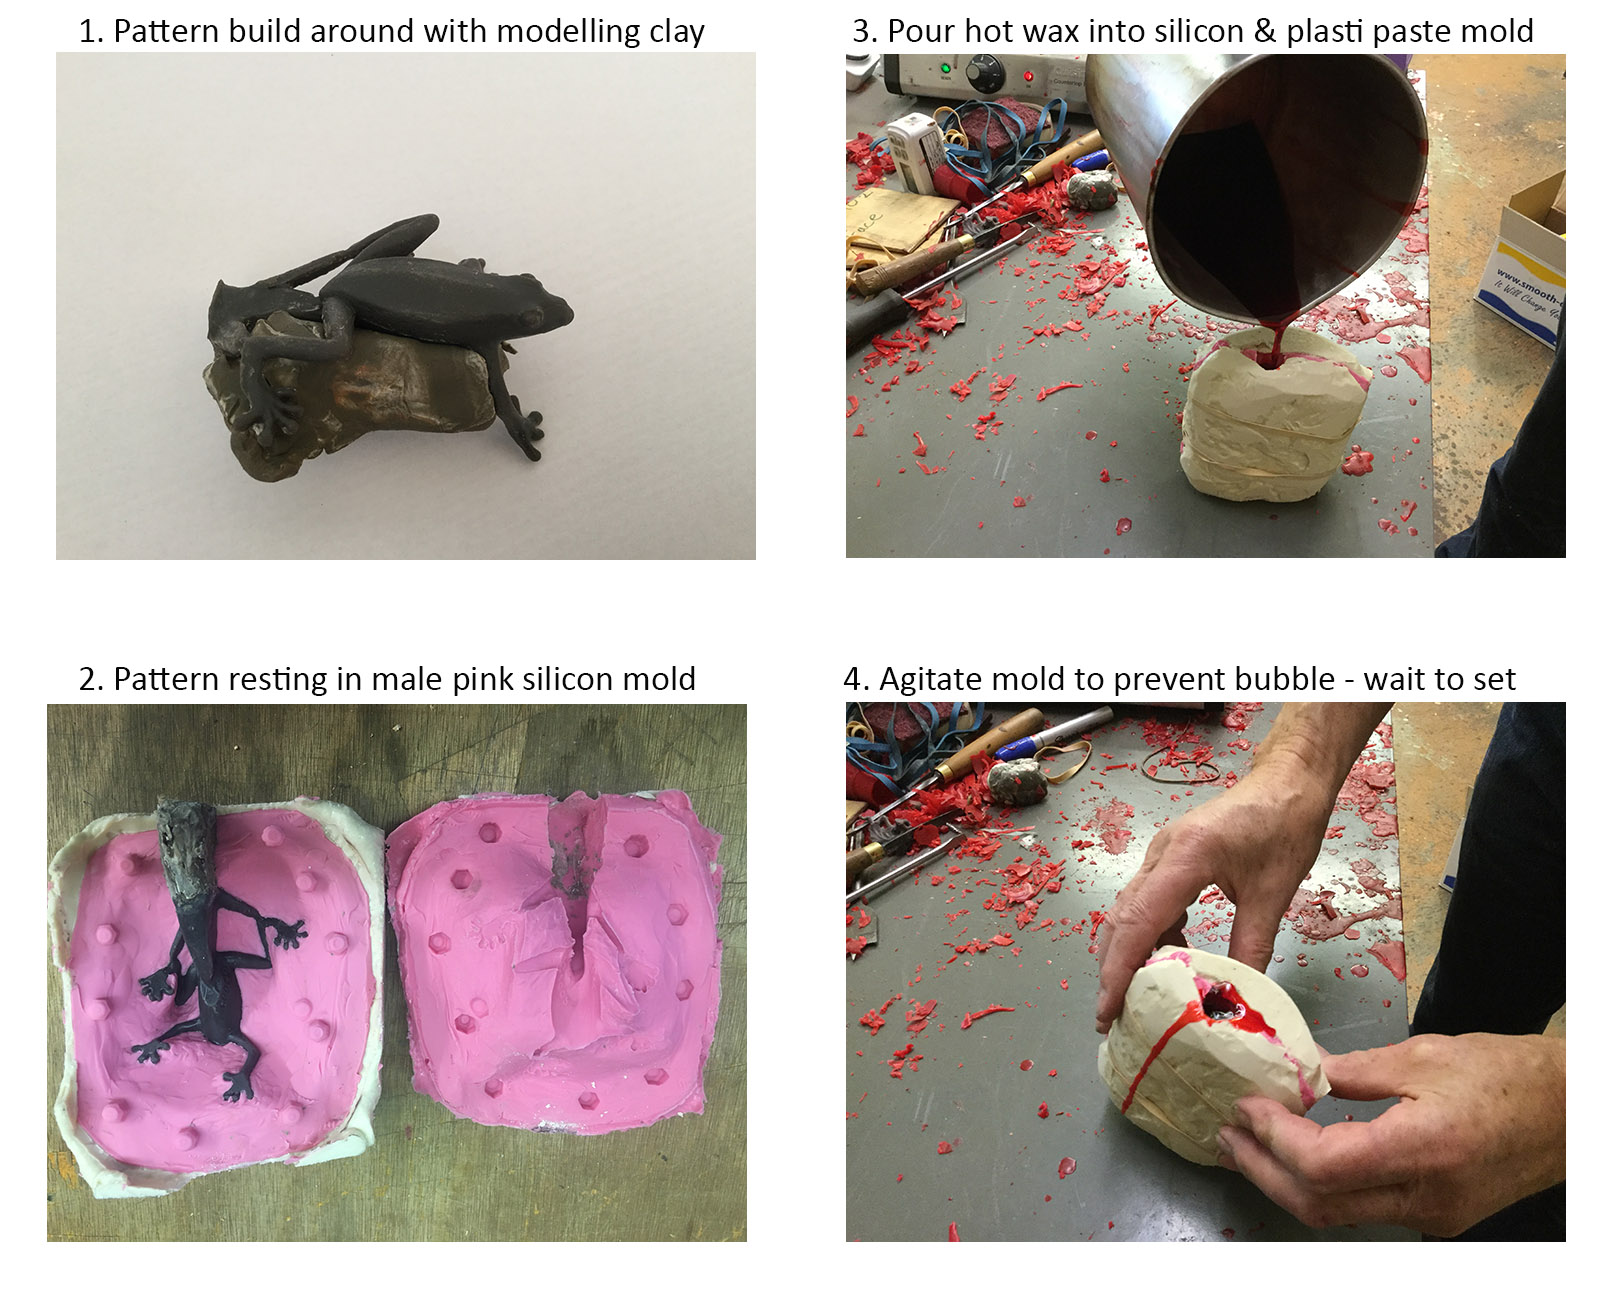
Over time all things age and the longevity of a mold will depend on the composition of the mold material and frequency of use. We make a variety of molds some require metal or fiberglass reinforcement and are not ideally suited for home use but others are possible to make at home provided you are patient and dexterous.
Our frog cabinet pulls are a popular item but we still make these by using a simple gravity pour rather than injection method to create the wax replicas for our lost wax castings.
The frog mold is a 2 part mold that is held together by simple peaks in one half of the mold and troughs in the other half mold that act as keys to tie the mold together. The troughs or holes are created using a drill bit or punch which is pushed into the modeling clay that holds the pattern in place. As this is a 2 part mold the skill comes in delicately building up the modeling clay up one half of the pattern without breaking of the small frog digits.
Once the frog is secure in modeling clay and all undercuts have been filled in we apply 3 or 4 coats of silicone rubber with a paint brush, we use Mold Max 30 by Smooth-on. After the silicon rubber is set we reinforce the mold with a more rigid plaster compound called Plasti Paste 11 by the same manufacturer.
Next we make the second half of the mold which will have the peaks that align with the troughs. First we spray on a mold release agent onto the female mold, we use Ease Release 200 by Mann Technologies. We then apply more of the silicon rubber to the mold which will collect in the troughs. We repeat the process described and once we have created a rigid case in Plasti Paste we are ready to start using our mold to create waxes. The release agent allows the 2 halves of the mold to separate, we then can remove the pattern and now we have a hollow space to receive the wax.
Useful sources
https://www.smooth-on.com/
www.moldreleases.com


