

We are currently working with a local designer who has specified many of our Willow cabinet pulls but who also needed a taller version of our Willow Sprig for use as an appliance pull. The client’s kitchen, not surprisingly, only required 3 large pulls and did not warrant the cost of a new patterns and mold. As our work is made using the lost wax method, we were able to create 3 new pieces by hand and by combining wax models. Please refer to our earlier post to see how the new pull was designed using a left and right facing Willow Sprig.
Step 1
A total of 3 Willow sprigs were created in wax. A left and right wax sprig were made for each end of the new piece and a section of a second left sprig was used to make a connector between the 2 ends. Picture below shows melted red art wax made by Westech being poured into the sprig mold, the wax has a relatively low meting point of 160 degrees.

Step 2
The mold is held together until the wax has cooled and solidified at which point the mold is pulled apart and the wax pattern thereby released.

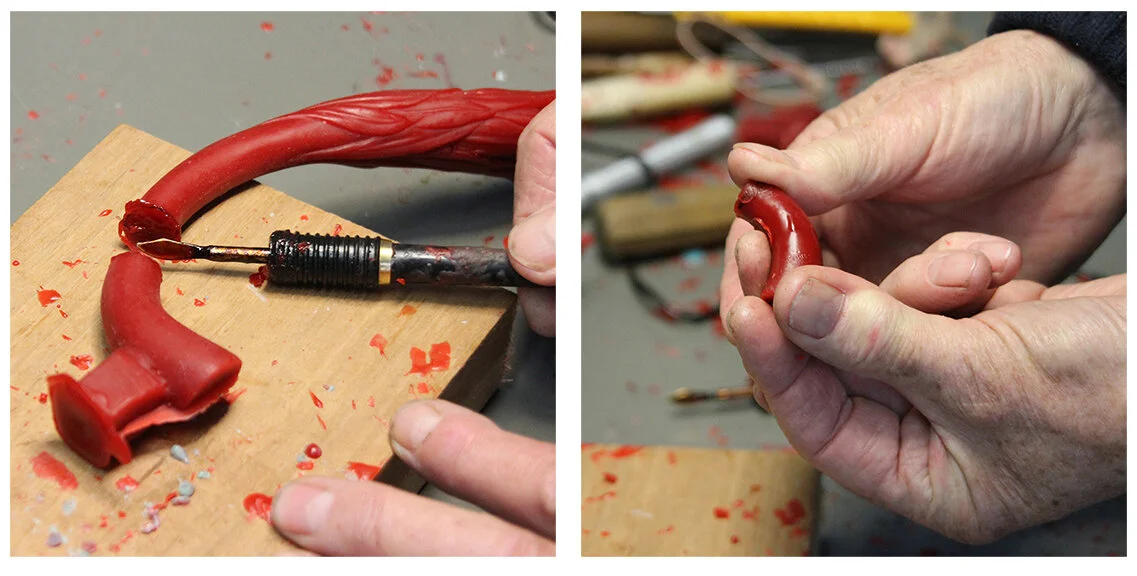
Step 3 and 4
The section to be used as a connector was cut from the wax sprig using a heated blade and then further heated with an air torch so that it could be bent to the correct shape.
The ends of the left and right sprig were cleaned and refined with a hand chisel.
Step 5
The ends of the left and right sprig were cleaned and refined with a hand chisel and then joined to the connector using a heated blade which melts the wax enabling it to be melded together to form one continuous piece.
