Limited Edition Custom Handle Commission in Bronze
We are frequently asked to make one of a kind door handles for designers looking for a statement piece for a restaurant or retail project or corporations looking to expand their brand presence. The requests we receive can be challenging and some, such as a request for rotating human hand, border on the bizarre.
As a company we do a lot of custom casting but the process we use to create our work is costly and does not lend itself to value engineering. The focus of this article is to outline the process with the aid of photographs taken during the creation of a wine cellar door handle, commissioned by a client as a limited edition.
As designers we truly respect the creative process and understand the time that goes into creating a unique piece and accordingly will only work on projects that are free from plagiarism.
The Process – step by step
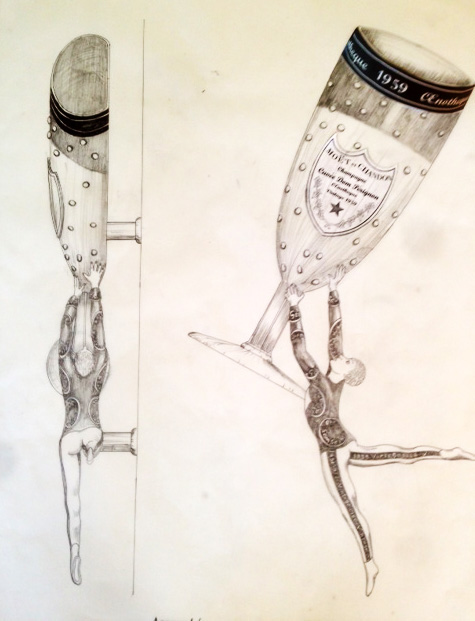
1. Concept drawing(s) often several form the starting point to a dialogue where we establish the size of the handle, whether it needs to operate a latch or is to be used as a stationary grip.
2. Perspective drawings are detailed drawings that show the client how the piece will look when viewed from different vantage points. We need to understand if the piece is being viewed from all sides as it would be if used as a grip mounted on a glass door. How the piece is to be mounted either by through bolts or surface screws will need to be decided and drawn.
Pattern Development
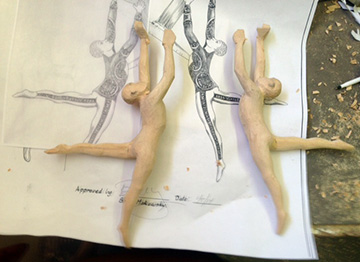
A three dimensional pattern is created in wood or if the piece is small, typically less than 3”, then in solid wax. At this point 3D printing is slow and expensive but it can be useful if one is creating a mirror image of a simple shape especially when the shape is symmetrical. We used 3D printing when creating the simple gourd shape for our Dragon Egg Sconce.
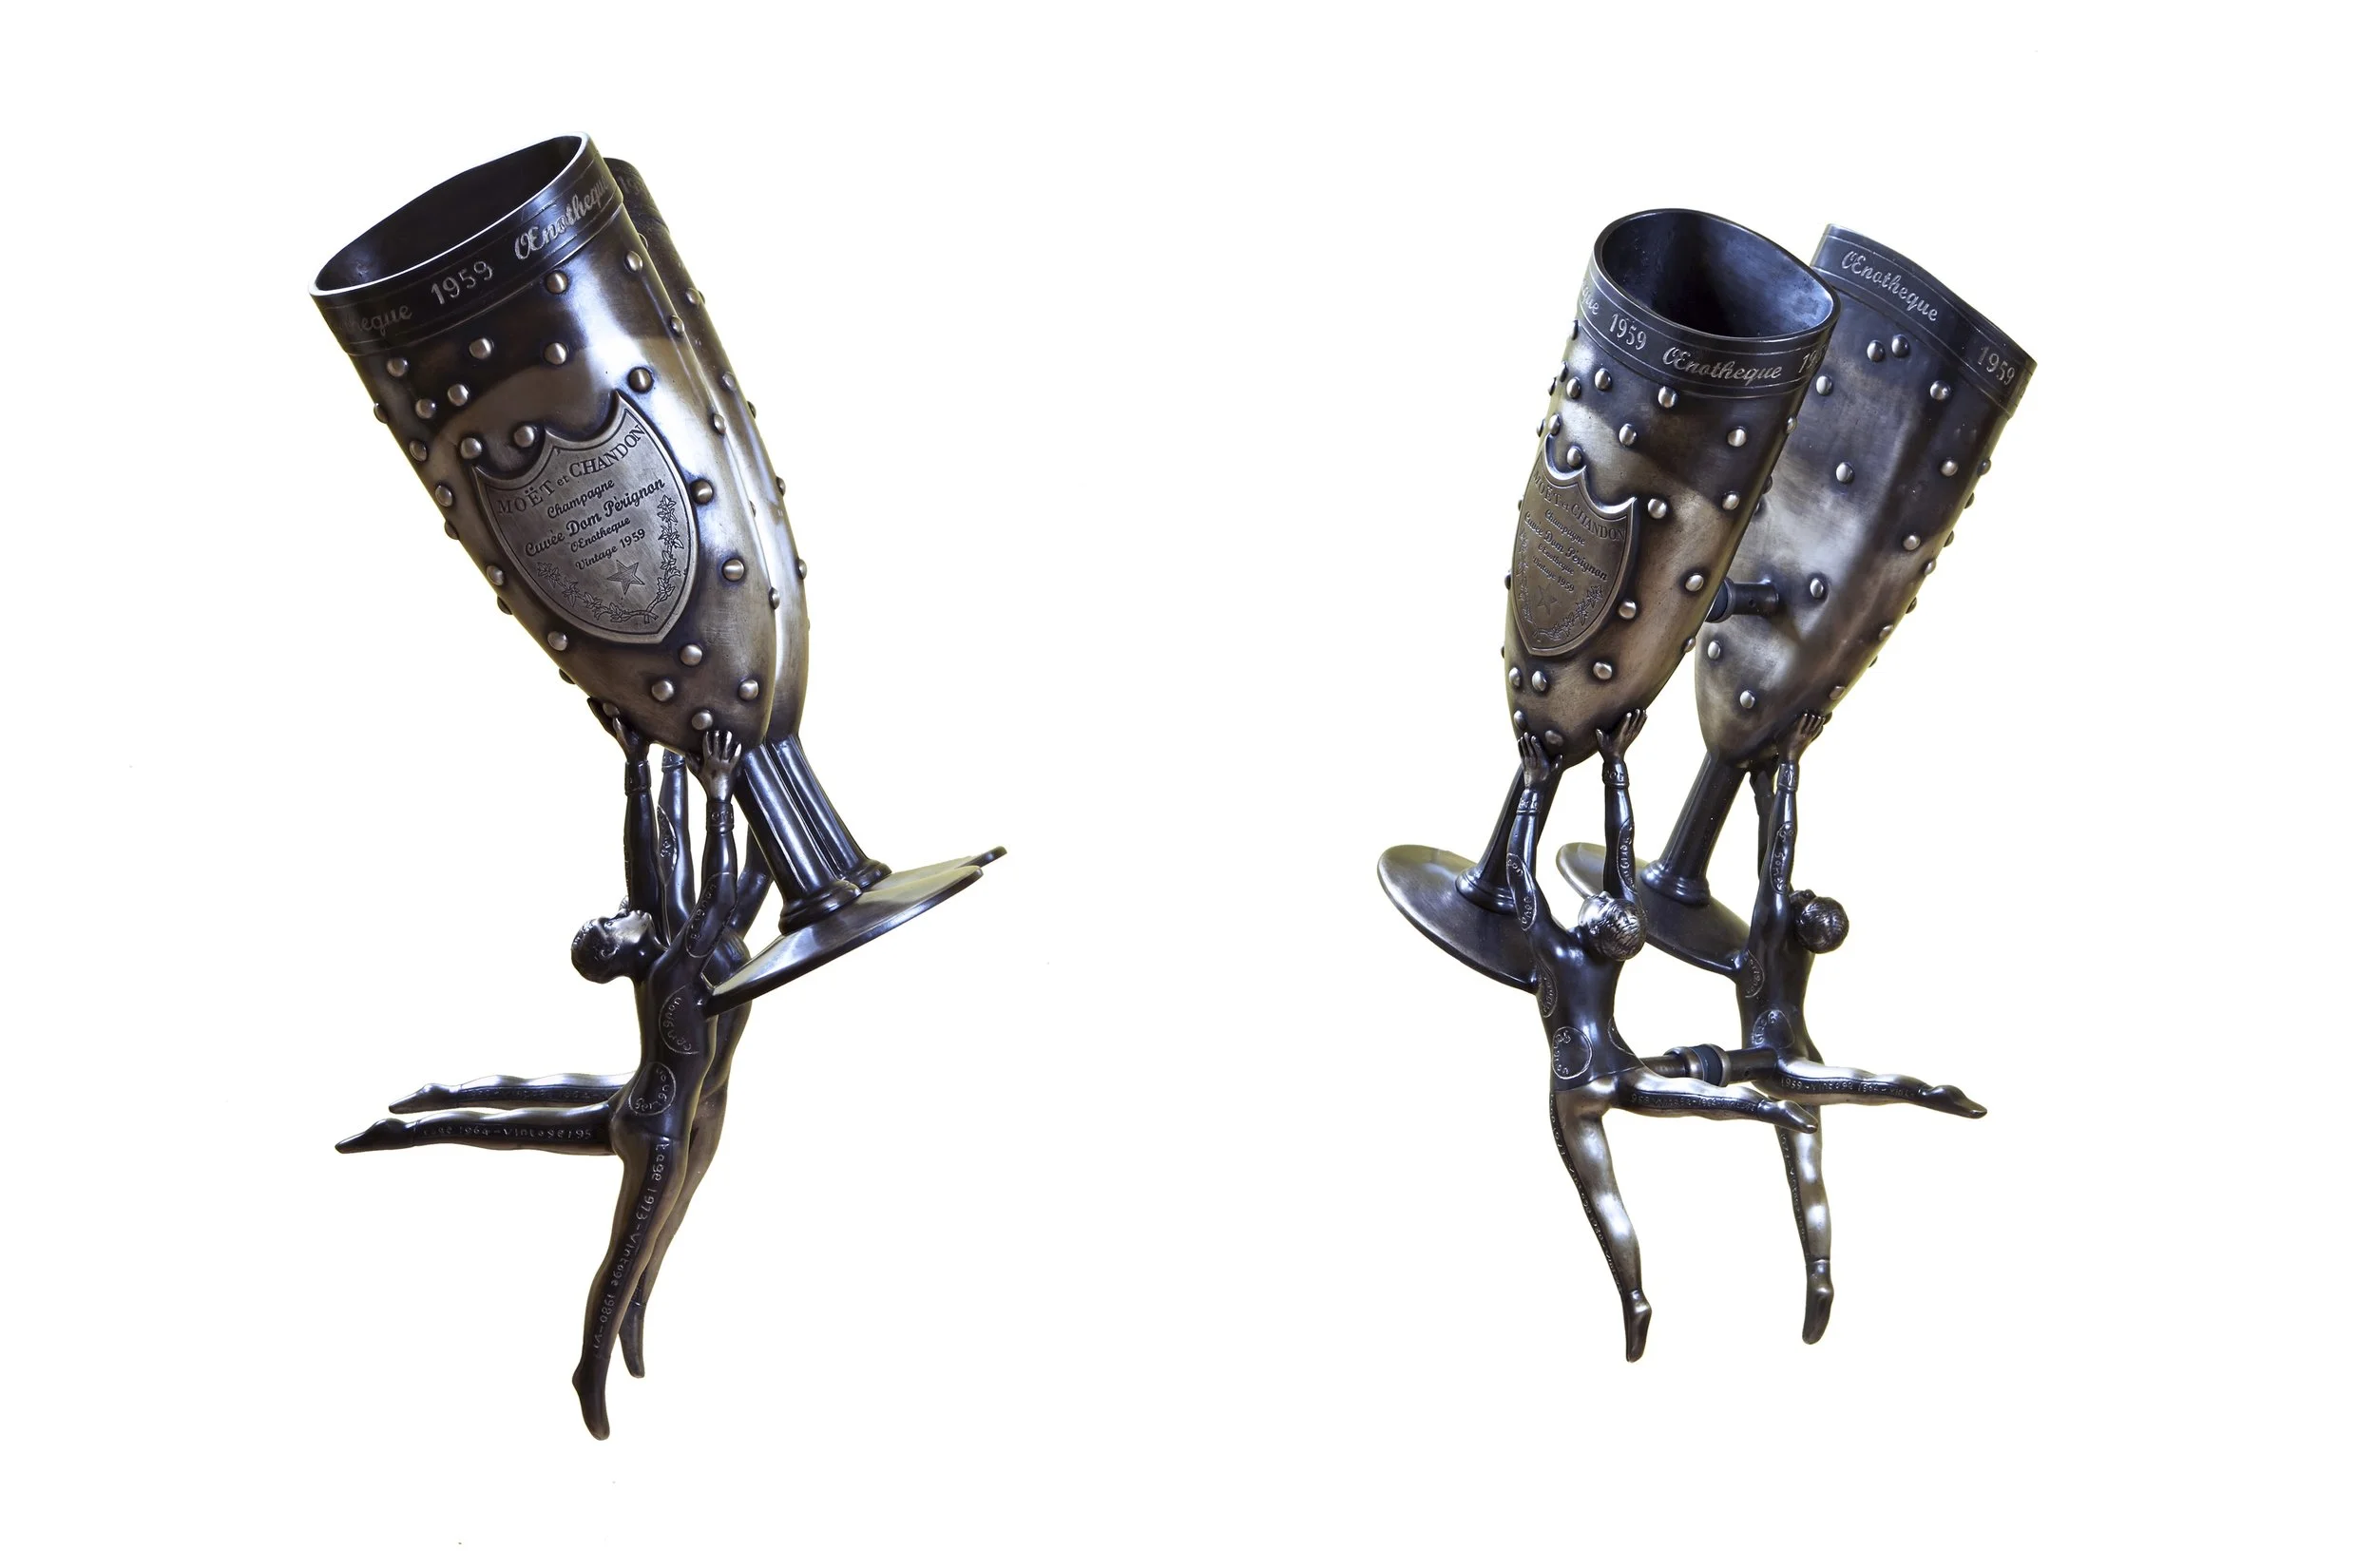
For larger detailed and organic pieces Martin Pierce carves the pattern by hand. He uses a reductive approach to whittle down his over-sized block of wood to create the pattern. Other pattern makers use an additive approach and they create the pattern by adding and forming pieces of clay. In our case study the design required 4 patterns to be carved, a left and right facing waiter and their two goblets. The patterns took many hours to create but by carving the pieces with an array of different chisels Martin could create a very detailed fine pattern and one whose details could be captured in bronze.

Mold Making
Each pattern requires a mold and if the piece has a lot of undercuts it may require a 2 piece mold. In this instance we developed a total of 4 two -piece molds each one made to encapsulate one of the 4 patterns. The molds are made from building up successive layers of silicone rubber that pick up the fine detail of the pattern. The pliable nature of the rubber is then reinforced by an outer casing made of plaster or metal which holds the 2 parts of the mold in place so that they can withstand the pressure applied when molten wax is injected into the cavity. The cavity is created when the pattern is removed from the mold and to make this easier the pattern is coated with a release agent before the rubber is applied.
Casting – what is meant by lost wax?
For every piece we cast in bronze, we first make a wax replica by pouring molten wax into the cavity of the mold. Theoretically these replicas could be 3 D printed but at this point the process is slow and expensive. Depending on the size and cooling time it is possible to make multiple waxes in a short period of time. At this point the channels that will be needed to supply the molten metal and those that are needed to vent the air created by flowing metal are added in the form of sprues and gates.

The wax replicas are then “shelled” and dipped into successive coats of liquid silica to build up a thick outer shell. If the shell wall is not sufficiently thick then it may well fail when the bronze is eventually poured. For large castings the shelling process can take weeks but it is a critical step that determines the success of the casing.
After the wax has been shelled the wax will be removed in an autoclave steamer that essentially steams or heats up the solid shell so that the wax is evacuated or “lost”.
The hollow shell or ceramic case is then fired and is ready to receive the molten bronze. Once the casting has cooled all the sprues and gates will be ground off and the casting will be groomed with metal files to remove any casting imperfections.
Chasing and machining the casting
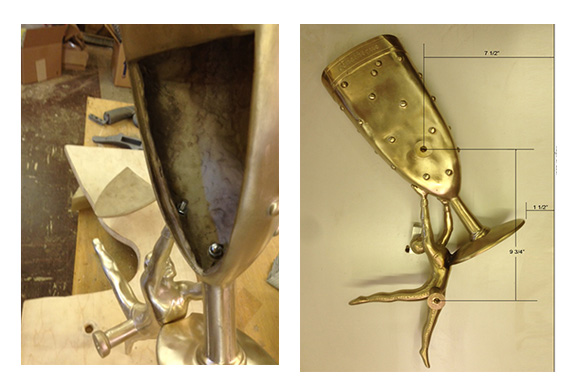
The casting will then be machined for mounting bolts, latches or other locks that it will be used with.
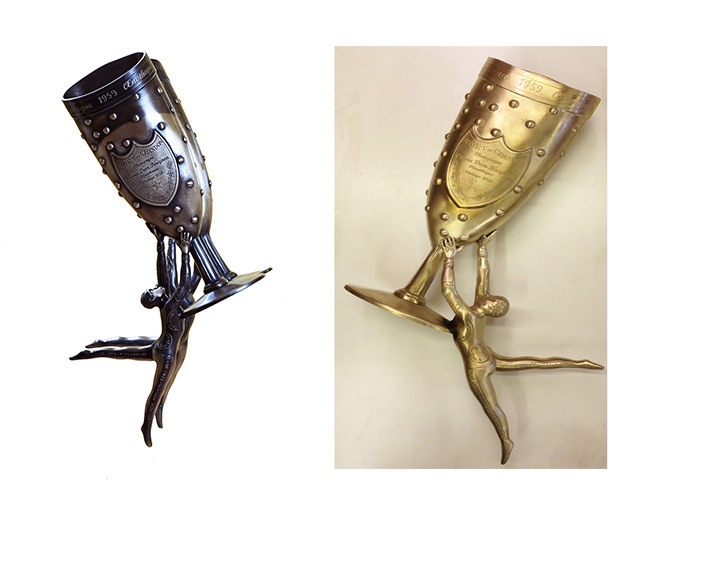
The casting is then ready to be finished. In our case study we applied 3 different types of chemical patina and re-burnished key areas so we could delineate the writing on the goblet and the waistcoat buttons on the waiter’s jackets.