
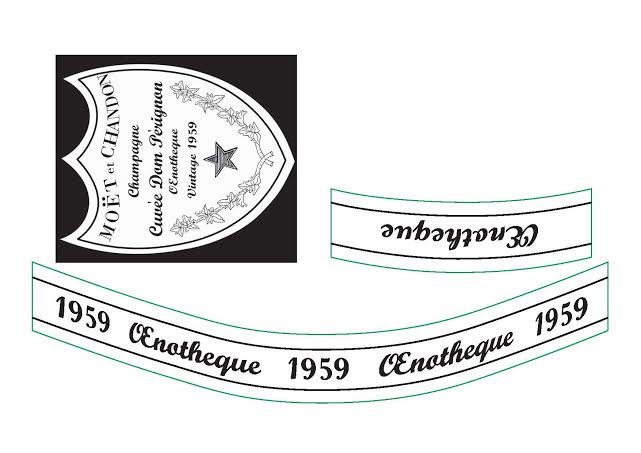
In part one of this series we shared the drawing that was ultimately chosen as the model for the final design of custom wine cellar door handles. Briefly, we were asked to create three dimensional door handles based on a serigraph owned by the client. We began with a drawing that showed the details and dimensions of the handles once they were completed.

Once this design was accepted by the client we moved on to the next step--carving the mold.
From a sculptural and casting perspective the concept had to be broken down into all of its components and we really were working with 2 concepts as we were making a left facing and right facing figure. We were also creating an extremely detailed piece and we wanted to show all the details including the script at the top and on the shield of the goblet as well as the fabric decoration on the seam of the waiter's jacket and trousers. So the components we were working with were:
- 2 Figures-one facing left, one facing right
- 1 Goblet
- 1 Goblet flute
- 1 Shield for the goblet to show the script
- 1 banner to add later to the goblet containing script
We began by creating the first sculpture, the goblet, which was carved from a block of bass wood. Using various sized chisels, Martin hollowed out the inside of the goblet to make it as thin as possible so that the ultimate piece would not need a crane to install as bronze is a very heavy metal.


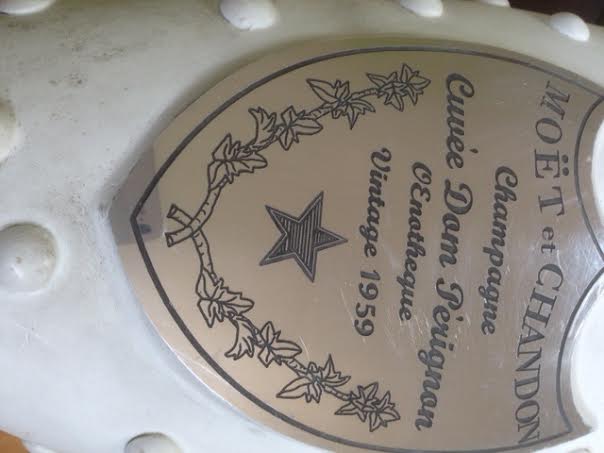
While carving a thin goblet wall takes a lot of skill, the bigger challenge was finding a way to make the shield so that the script would be legible. He carved the unadorned shield as a separate pattern and worked with Bob Pierce, his brother, to create the script for the shield and band as a digital image.
The next step was to have the script chemically etched onto a piece of metal that would be attached to the goblet. We worked with a great metal etching company we have worked with many times in the past to create a recessed text onto 1/16" aluminum. The metal needed to be thin enough to bend in order to mount it onto the wooden form. The same technique was used to create the banner at the top of the goblet.
As these are wine cellar door handles one very important detail was still needed--bubbles. We put our knowledge of upholstery to use and found some upholsterers decorative nail heads that were the perfect size and shape to mimic bubbles. And here is the finished pattern.

The piece is now ready for the next step--stay tuned for part three of this series. And to view our entire collection of custom hardware, please visit our site at www.martinpierce.com.