investment casting

Floral Developments – Simple Mold Making Lost Wax or cold cast resin

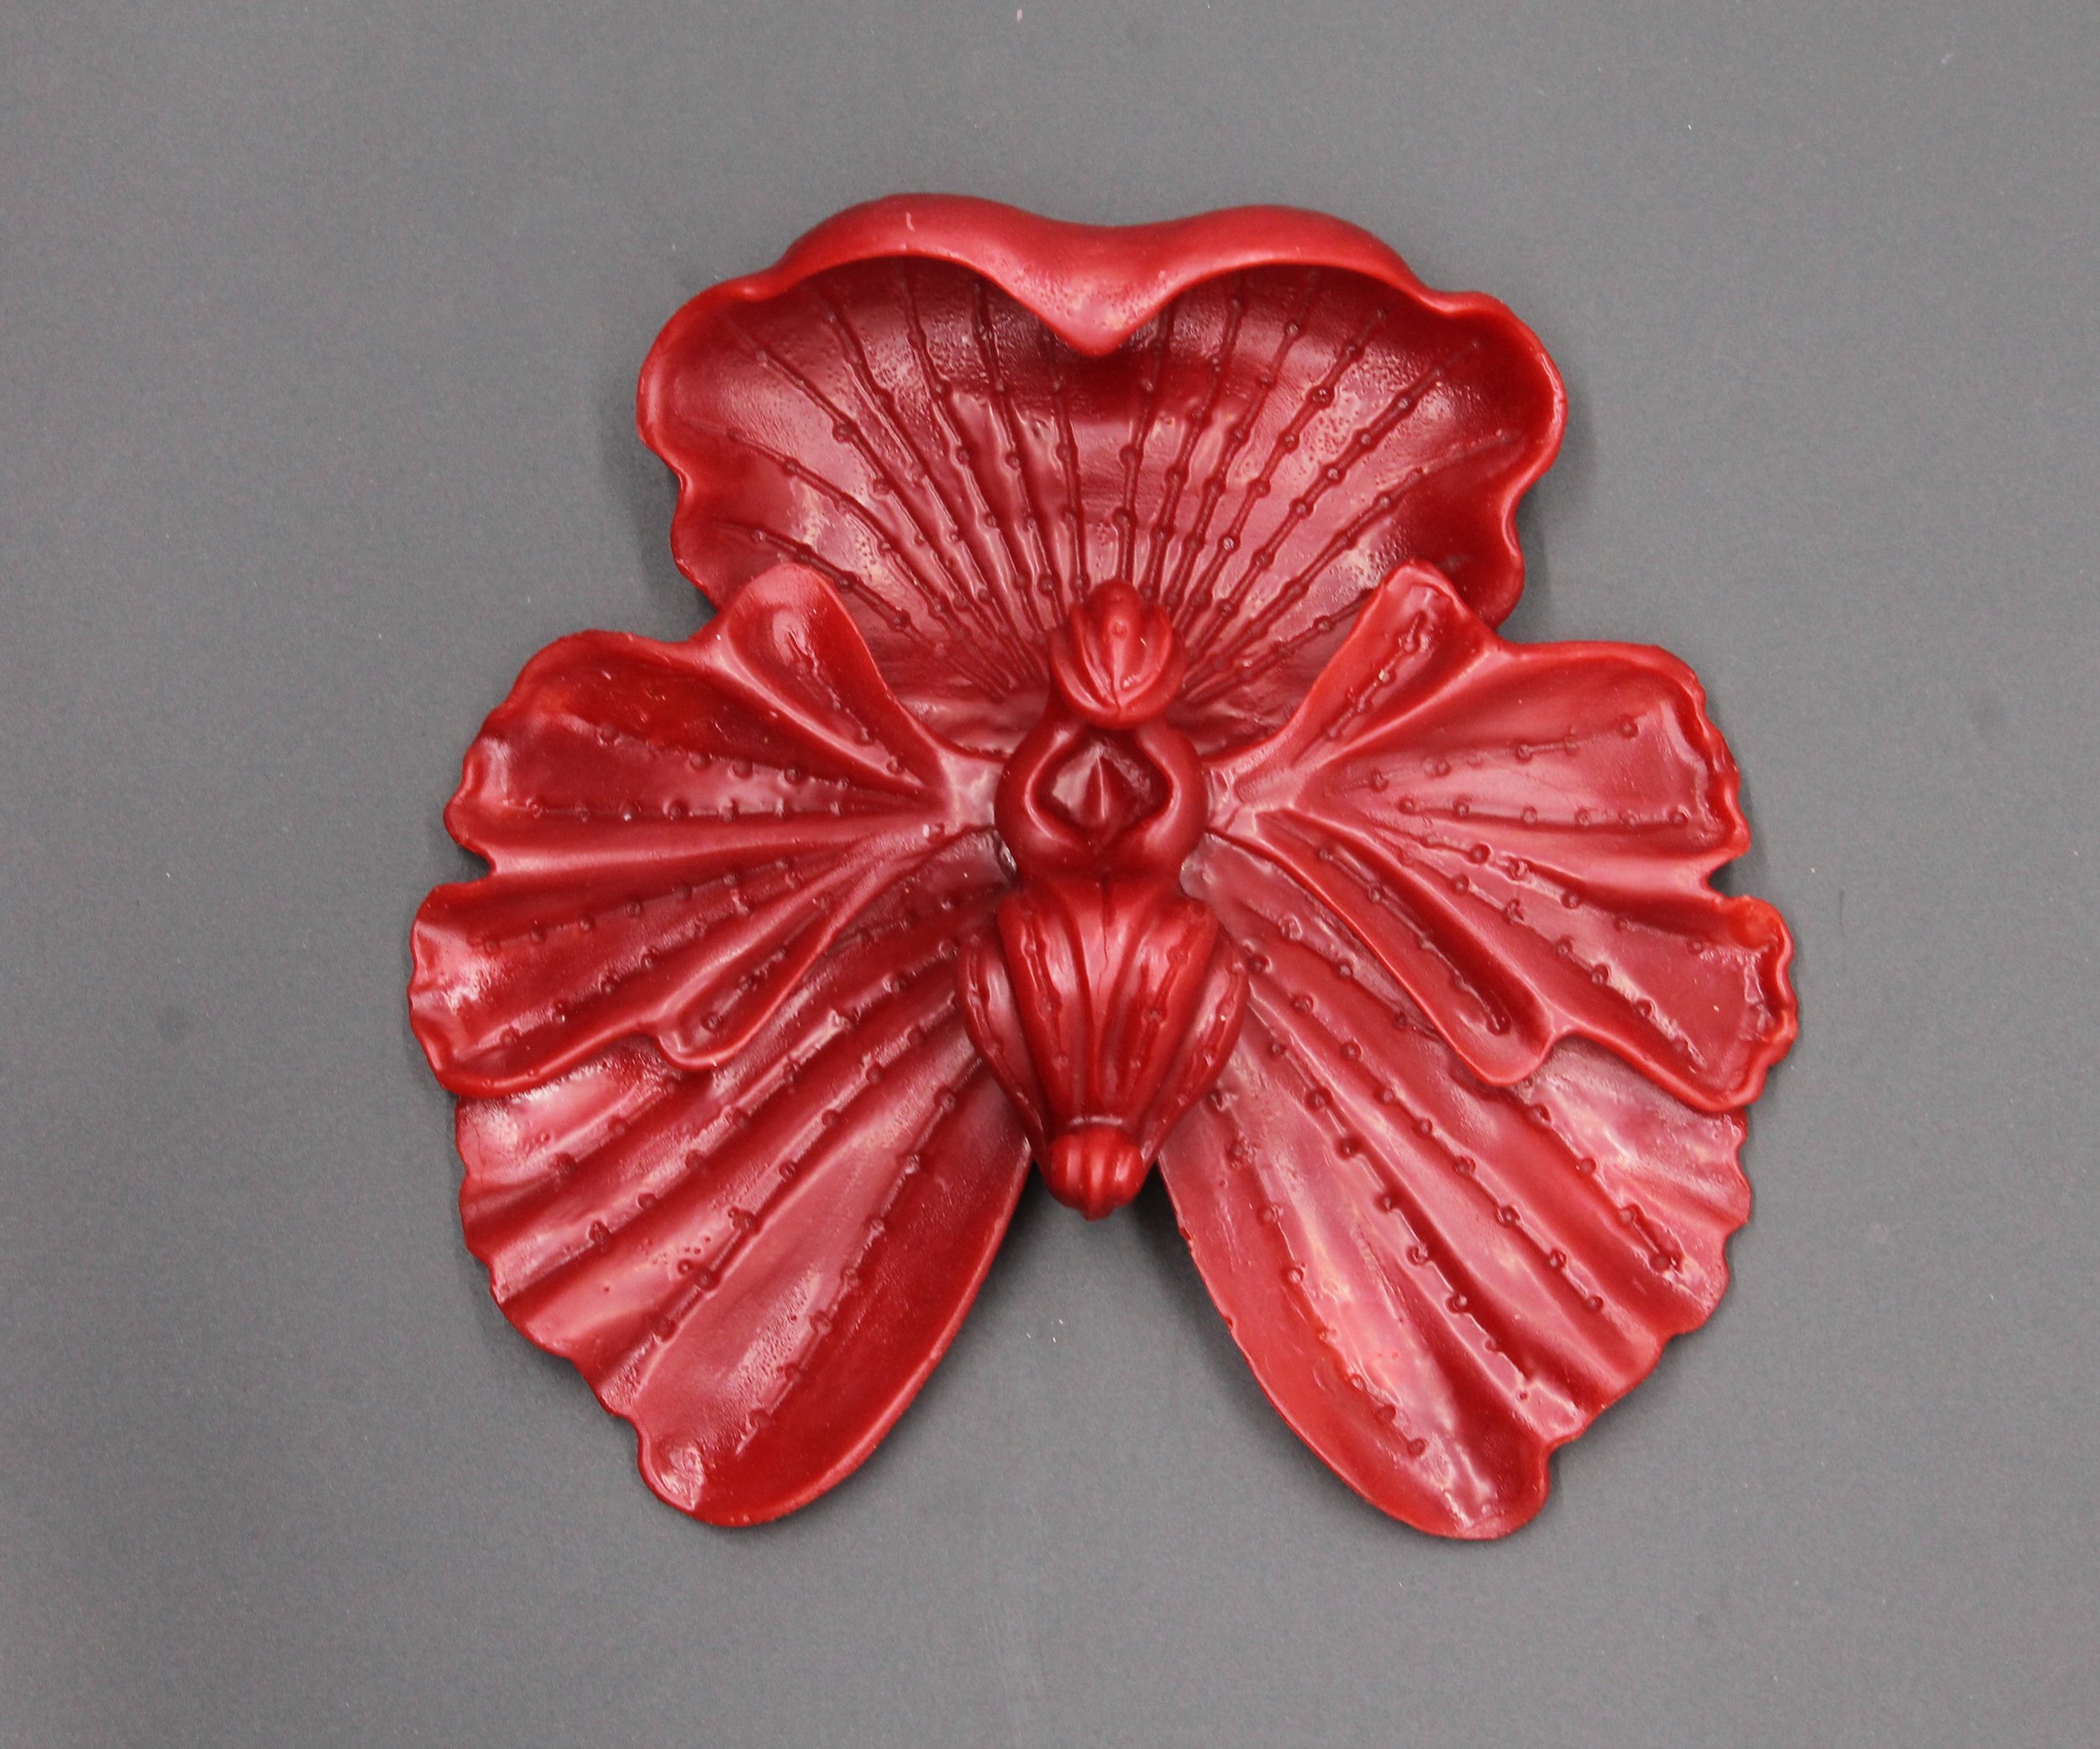
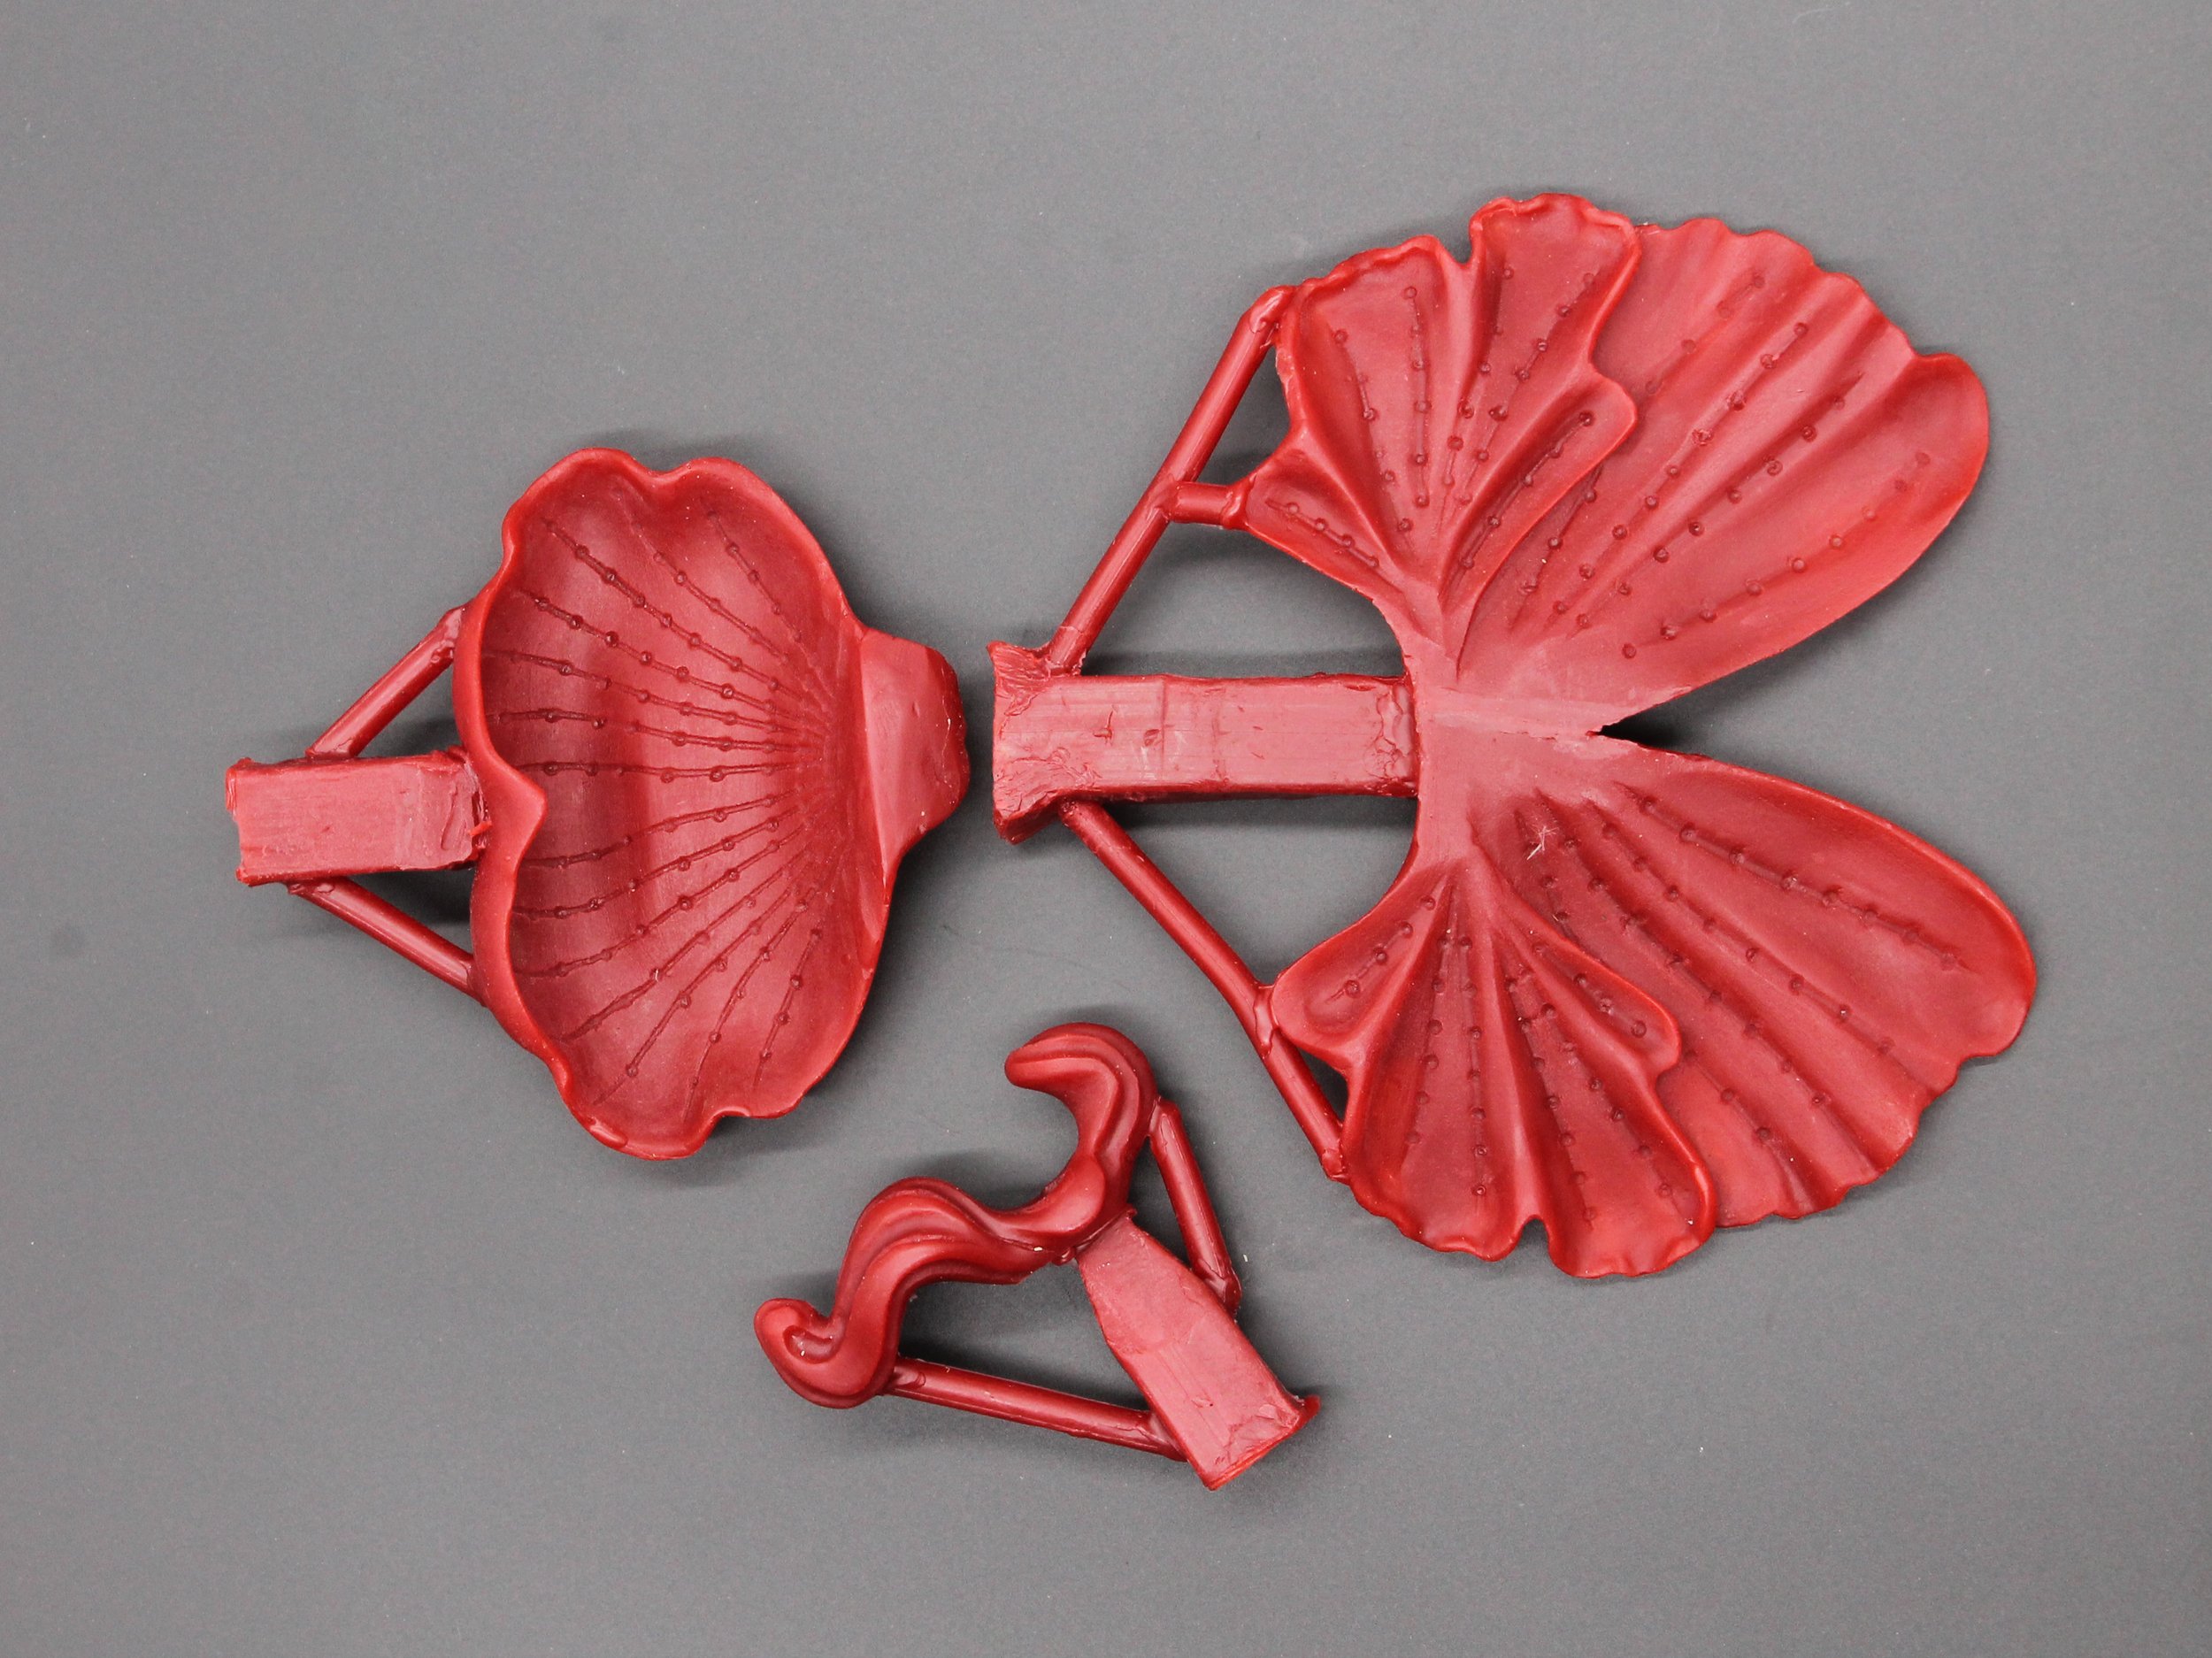
In the previous post we documented the designing and pattern creation process for our new large orchid pull. Next, we make 3  two-part molds, one for each of the stamen, labellum, and petals.

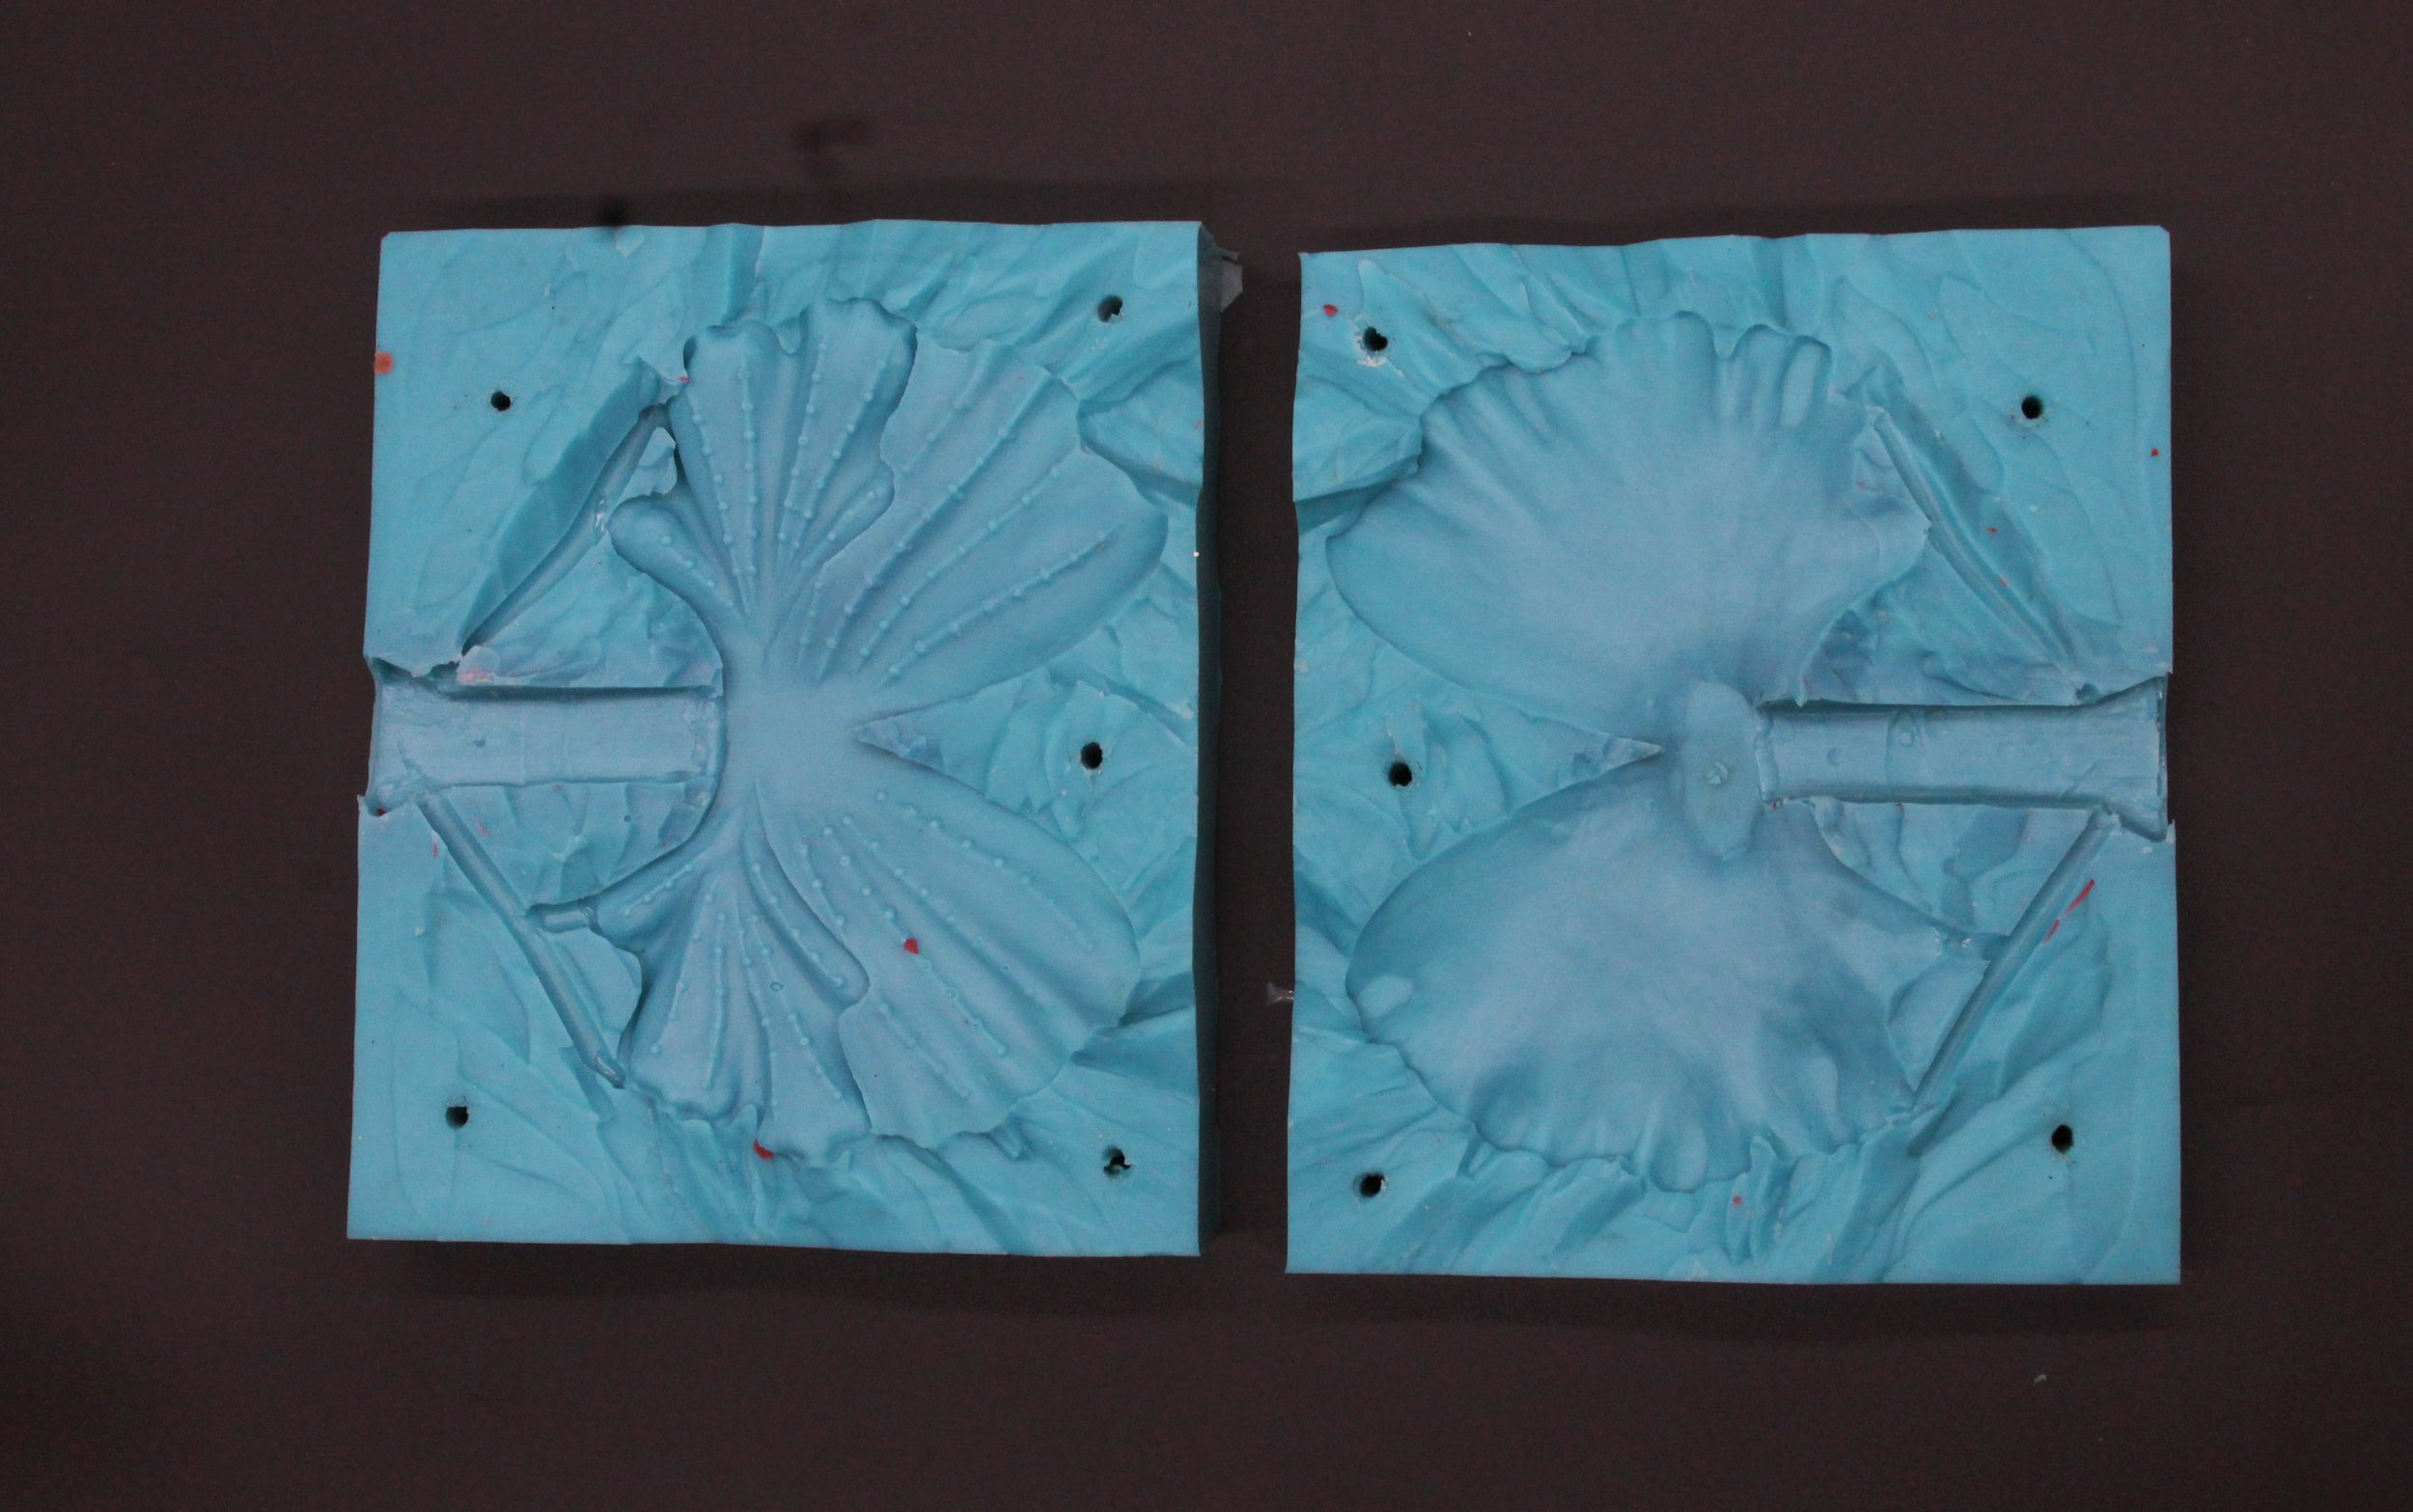
Our mold is made using a 2-part silicone rubber solution Mold Star distributed by Reynolds Rubber.

The wax sections are assembled so that we will have template to guide how we weld the 3 parts.

Mold Star is available in different degrees of pot life, meaning the amount of time it takes before the mixed solution sets. Mold Star 16 has a shorter pot life and quicker curing time than Mold Star 15 and is the rubber we prefer using. For large area with more volume of rubber we add another Reynolds product, Slo-Jo that slows the curing time. As the silicone rubber is curing and especially for larger dense molds there is a tendency for gas pockets to form. The pockets may not be visible but when wax is subsequently poured into the silicone mold the pockets will create small holes in the wax. To prevent this, we place the thoroughly mixed silicone into a vacuum chamber and pump out the air and gases that form and when the remaining bubbles are extremely small, we then pour the solution over our pattern to create the mold.

The 3 sections will be cast separately and will be welded together once cast

These are simple 2-part molds that most hobbyists could make with a little time and practice. As the patterns are not too deep, they will be cast in solid bronze rather than as hollow castings. Our molds are used to create wax replicas for use in lost wax casting but the same type of mold could be used to create fiberglass or resin pieces. Gates and a central sprue are added to the pattern and these will become  the channels for the poured bronze. The gated pattern is placed in a tight-fitting container and the silicone solution is poured over it and left to set. Once set, we insert a sharp blade into the side of the mold and cut around the outer edge and gently pull the mold apart to release the pattern. The cavity that has been formed around the pattern is then filled with hot wax which passes through a central hole in the mold. The 2 halves of the mold are firmly held together with 2 pieces of bolted plywood that will keep the mold rigid when the wax is being poured. Once the wax has set the plywood is unbolted, the 2 parts of the mold are pulled apart and the wax replica is ready to be shelled. If you were casting your piece in resin, you would omit the gate and sprues and your product would be complete after the resin had set.

2 Part mold for petals these are held together with bolted plywood when wax is being poured

The orchid is assembled in wax as a guide we will use when welding the bronze sections together. The piece could not be cast as a single flower as there are too many undercuts and the bronze would not pour easily.

Bolts keep the 2 plywood formers in place while red wax is poured

Custom door hardware - an index of posts on the process

Over the years of writing my blog I have often described the process from designing to casting door hardware using the lost wax method but have not until now felt it necessary to index  these posts.

The posts are broken down into 5 areas that describe the process from inception to end product. If you have limited reading time there is one piece that covers most of the stages that was was posted on June 21st 2017.

For details on the different stages please read on.

STAGE 1 - Design

These posts follow the creative process from the initial sketch to more detailed drawings that show the piece from different perspectives. They explain how the technical aspects of lost wax casting as well as the functional requirements of door hardware impact the design and result in modifications to the original concept.

https://www.martinpierce.com/blog/dragon-and-netsuke-door-knobs

https://www.martinpierce.com/blog/custom-designed-door-hardware-some-common-misunderstandings

https://www.martinpierce.com/blog/early-designs-for-a-new-entry-door-pull

https://www.martinpierce.com/blog/candlesticks-new-designs

https://www.martinpierce.com/blog/new-morphic-door-pull-one-size-does-not-fit-all

Stage 1 - detailed drawing from 2 perspectives Stage 2 - rough carving of pattern later refined

STAGE 2 – Pattern making

Lost wax casting requires an  original pattern or sculpture to be created. We create our patterns by sculpting  in a hard wood, blue wax or high-density foam. Our method is reductive and rarely makes use of 3D printing and we explain why in these posts.

https://www.martinpierce.com/blog/bumble-bee-cabinet-knob

https://www.martinpierce.com/blog/dog-door-knobs

https://www.martinpierce.com/blog/new-carp-fish-door-pull

https://www.martinpierce.com/blog/why-research-and-development-costs-for-custom-hardware-is-expensive-part-2

https://www.martinpierce.com/blog/3d-printing-as-useful-tool-in-casting-custom-door-handles

STAGE 3 - Mold making, gates and sprues

A mold of the pattern is made. The number of molds needed for one design depends on the complexity of the design and in assessing how the molten bronze will flow. The pattern is fitted with one central sprue and several gates that attach to the sprue and the edge of the pattern. A mold (s) is then  made of the pattern with the sprue and gates attached.

https://www.martinpierce.com/blog/how-to-make-a-simple-mold-for-lost-wax-casting

https://www.martinpierce.com/blog/how-to-cast-bronze-butteflies-good-and-bad-runners-and-gates

STAGE 4 – Wax replicas and shelling

The lost wax method requires a wax replica to be made for all the component parts needed to make one piece. The Hedgerow door lever for example require 4 waxes to be made; one for the escutcheon, one for the lever, 2 for the tree canopy. The waxes are then dipped in a silicone slurry that when hardened forms a shell that encases the wax. An auto-clave is used to remove the wax (lost wax)  and the hollow shell is ready to receive molten metal.

https://www.martinpierce.com/blog/wine-cellar-door-handles-and-shell-casting

https://www.martinpierce.com/blog/using-wax-facsimiles-to-create-bronze-door-handles

 https://www.martinpierce.com/blog/hawaiian-theme-door-handle

https://www.martinpierce.com/blog/creating-a-custom-appliance-pull-using-the-lost-wax-process-the-wax-stage

 https://www.martinpierce.com/blog/limited-edition-door-handles

Wax replicas ready to be shelled


Dragon and Netsuke Door Knobs

Dragon and Netsuke Door Knobs


Dragons appear in fictional literature and are brilliantly described in the witty tale “Guards,Guards!” by Terry Pratchett. More recently they were portrayed as loyal protective demons in “Game of Thrones”. So, it will come as no surprise that we are adding a dragon door knob to our Netsuke collection.

Credit also needs to be given to Dr. Lisa Allen who ordered a Netsuke bumble bee and asked if we had plans for a dragon knob. We had not been planning an addition to the Netsuke collection so as an alternative, suggested Lisa order the lizard knob. If one looks at the portrayal of dragons in different times and cultures they range from serpentine winged creatures to horned scaly lizard-like creatures not unlike the Komodo “dragon” lizard found in Indonesia. Lisa was not to be persuaded by my lizard argument, so Martin turned to his sketch pad to wait for dragon inspiration.

Original Pattern Carved in High Density Foam - Finer Details then Carved into Applied Gesso

What follows is an account of how the dragon knob was designed, carved and by use of lost wax casting will soon take flight as a bronze door knob.

As the Dragon knob will become part of the Netsuke collection we used the compactness inherent in this collection as a focal point. This meant that the dragon had to fold in and around itself and cling tightly to the center of the knob to form an ergonomically pleasing shape that had few jagged protrusions. The tight compact and smooth design characterizes the bee, lizard, rabbit and frog knobs and is why the collection is named Netsuke after the early smooth animal toggles used as fasteners for garments and satchels in traditional Japanese clothing.